Best 20-Minute Crispy Air Fryer Brussels Sprouts with Garlic
By Chef Mansoor | Flavour Bazar
The Vegetable Everyone Hated—Until Now 🥬
Everyone says Brussels sprouts taste like sulfur-soaked sadness. Everyone is wrong.
The problem was never the sprout. It was the method. For decades, home cooks boiled these little brassica gems into submission, releasing glucosinolate compounds that smell like rotten eggs and taste even worse. The texture turned to mush. The color faded to gray-green. No wonder an entire generation grew up hating them.
Then the air fryer changed everything. When you make Crispy Air Fryer Brussels Sprouts with Garlic, you are not just cooking a vegetable. You are engineering a transformation at the molecular level. High heat, minimal oil, and turbulent air circulation trigger the Maillard reaction and caramelize natural sugars. The outer leaves shatter like glass. The core stays tender. The garlic infuses without burning.
I have batch-tested these sprouts at five-degree temperature increments to find the exact point where the leaves crisp without the core becoming mushy. I tested different garlic application timings. I experimented with shake intervals. After more than thirty batches, I can tell you: Crispy Air Fryer Brussels Sprouts with Garlic are not just possible—they are one of the most reliable high-impact side dishes you can make in under twenty minutes.
The Science Behind the Crunch 🧪
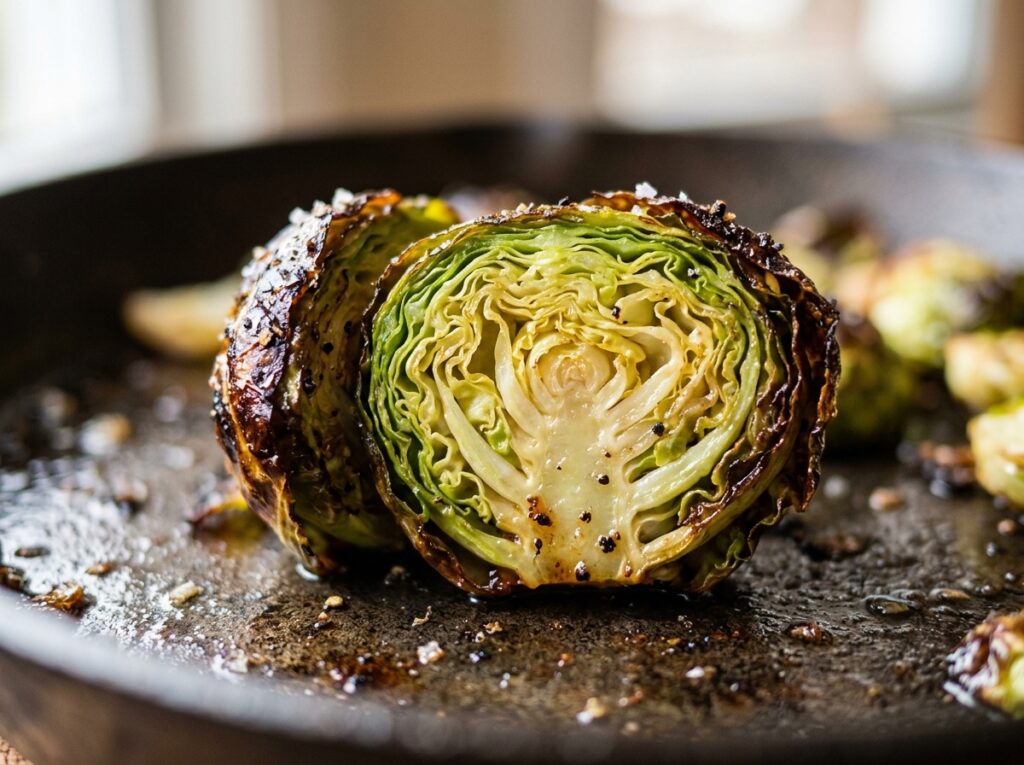
When you roast Brussels sprouts in an air fryer at 400°F (204°C), two major chemical reactions happen simultaneously: the Maillard reaction and caramelization.
The Maillard reaction is a form of non-enzymatic browning that occurs when amino acids (proteins) react with reducing sugars in the presence of heat. Brussels sprouts contain both naturally. When exposed to temperatures above 300°F (149°C), these compounds begin to break down and recombine into hundreds of new flavor molecules called melanoidins. These are responsible for the deep, nutty, roasted flavor that makes Crispy Air Fryer Brussels Sprouts with Garlic so addictive.
Here is the basic chemistry:
Sugar+Amino Acid+Heat→Melanoidins
In simple terms: heat + protein + sugar = deliciousness.
At the same time, the natural sugars in the sprouts—mostly glucose and fructose—begin to caramelize. This happens around 320°F (160°C) and intensifies as temperature rises. Caramelization creates complex, bittersweet notes and a golden-brown color. The outer leaves, being thinner and more exposed to airflow, caramelize faster and harder than the dense core. That is why you get crispy edges and a tender center.
The air fryer amplifies this process because of convection. Unlike a conventional oven where heat rises passively, an air fryer uses a powerful fan to circulate hot air at high velocity. This removes moisture from the surface of the sprouts almost instantly, creating the dry environment necessary for browning. Moisture is the enemy of crispness. The faster you evaporate it, the crunchier your vegetables become.
Garlic adds another layer of complexity. Fresh garlic contains sulfur compounds called allicin, which break down into a cascade of aromatic molecules when heated. But garlic burns easily. At temperatures above 375°F (190°C), it can go from golden to bitter in under sixty seconds. That is why timing is everything when making air fried brussels sprouts with garlic.
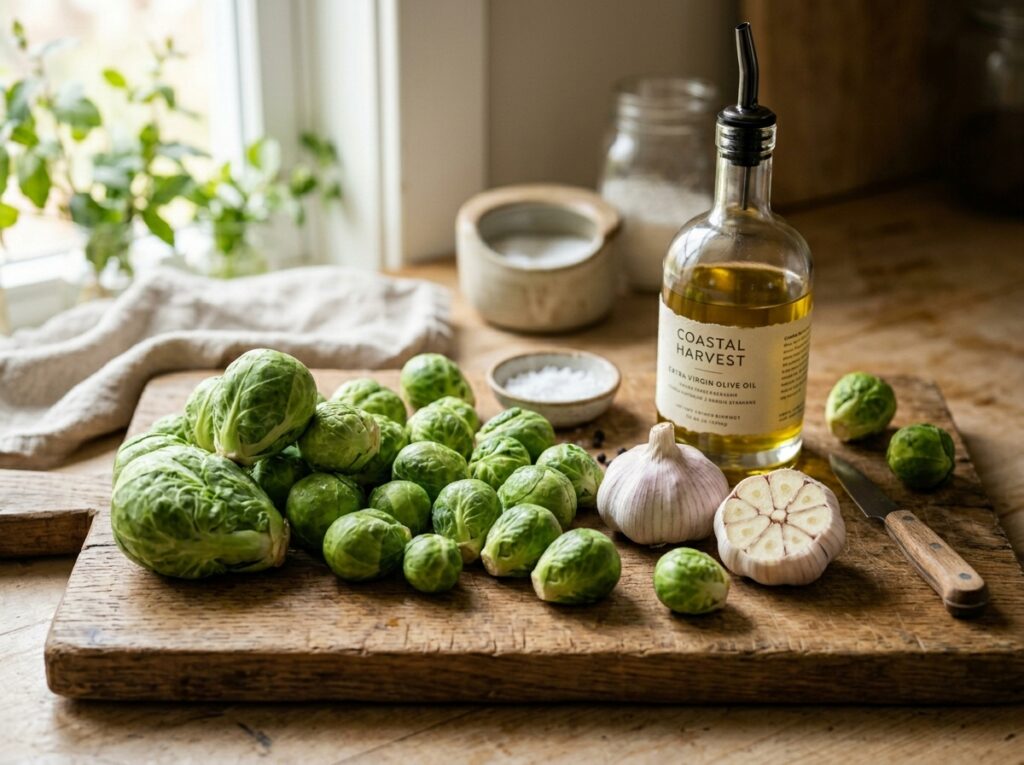
What to Buy and Where to Find It 🛒
Let me be specific about sourcing because quality matters. Not all Brussels sprouts are created equal, and the air fryer will expose every flaw.
Best Brussels Sprouts to Buy:
Trader Joe’s sells pre-trimmed Brussels sprouts in 12 oz (340g) bags. These are consistently sized, which means even cooking. No sorting required. If you are buying loose sprouts from Kroger or Whole Foods, look for firm, compact heads with bright green leaves. Avoid any with yellowing, soft spots, or a strong cabbage smell—those are past their prime.
Size matters. Aim for sprouts that are roughly one to one-and-a-half inches in diameter. Larger sprouts take longer to cook and may char on the outside before the core softens. Smaller sprouts cook faster but can dry out. Medium is the sweet spot for Crispy Air Fryer Brussels Sprouts with Garlic.
Oil and Fat:
Use a neutral oil with a high smoke point. Chosen Foods Avocado Oil (available at Target and Walmart) is my top pick. It has a smoke point of 500°F (260°C), so it will not break down or taste bitter. Kirkland Signature Organic Extra Virgin Olive Oil from Costco also works, though it has a slightly lower smoke point around 375°F (190°C). For maximum crispness, use a spray bottle or a pastry brush to apply a thin, even coat. Too much oil makes the sprouts greasy, not crispy.
Garlic:
Fresh garlic is non-negotiable for flavor depth. Buy whole heads, not the pre-minced stuff in a jar. That jarred garlic contains preservatives and lacks the punch of fresh cloves. If you are short on time, Badia Granulated Garlic or McCormick Garlic Powder can work in a pinch, but add it after cooking to avoid burning.
Finishing Touches:
For a sweet-savory glaze, drizzle with Kirkland Signature Balsamic Glaze from Costco. It is thick, syrupy, and does not water down the crispness. If you want heat, grab Frank’s RedHot or a pinch of red pepper flakes.
Air Fryer Recommendations:
This recipe works best in the Ninja Foodi 8-Quart or Cosori Pro II 5.8-Quart. Both have powerful fans and accurate temperature controls. If you are using a smaller basket model, cook in batches. Do not crowd the basket or you will steam the sprouts instead of roasting them.
Before you start, make sure you have everything ready for the best Crispy Air Fryer Brussels Sprouts with Garlic.”
Ingredients 📝
| Ingredient | US Customary | Metric |
|---|---|---|
| Brussels sprouts, trimmed and halved | 1 lb | 450g |
| Avocado oil or olive oil | 1½ tbsp | 22ml |
| Kosher salt | ¾ tsp | 4g |
| Black pepper, freshly ground | ¼ tsp | 1g |
| Garlic cloves, minced | 4 cloves | 12g |
| Balsamic glaze (optional) | 1 tbsp | 15ml |
| Red pepper flakes (optional) | ¼ tsp | 0.5g |
| Parmesan cheese, grated (optional) | 2 tbsp | 10g |
Common Mistakes That Ruin Air Fryer Brussels Sprouts ❌
| The Mistake | What Actually Happens | The Fix |
|---|---|---|
| Not drying the sprouts after washing | Moisture creates steam, leaves turn soggy instead of crispy | Pat completely dry with paper towels or a clean kitchen towel |
| Crowding the air fryer basket | Air cannot circulate, sprouts steam instead of roast | Cook in a single layer with space between each sprout half |
| Adding fresh garlic at the start | Garlic burns and turns bitter at 400°F before sprouts finish cooking | Add minced garlic in the final 2-3 minutes of cook time |
| Using too much oil | Excess oil pools at the bottom, making sprouts greasy and heavy | Use 1½ tbsp max for 1 lb sprouts—just enough to coat lightly |
| Skipping the preheat | Sprouts stick to the basket and cook unevenly | Preheat air fryer for 3-4 minutes before adding vegetables |
| Not shaking or tossing midway | One side chars while the other stays pale | Shake basket at the 8-minute mark for even browning |
How to Make Crispy Air Fryer Brussels Sprouts with Garlic: Step-by-Step 👨🍳
Step 1: Prep the Brussels Sprouts
Start by rinsing the Brussels sprouts under cold water. Trim the tough stem ends with a sharp knife, then cut each sprout in half lengthwise. If any outer leaves fall off during cutting, save them. Those loose leaves will crisp up beautifully and turn into little flavor chips.
Transfer the halved sprouts to a clean kitchen towel or a stack of paper towels. Pat them completely dry. This step is critical. Any surface moisture will turn to steam in the air fryer, and steam is the enemy of crispness. Take your time here. Thirty seconds of drying will save you from soggy disappointment.
Once dry, transfer the sprouts to a large mixing bowl.
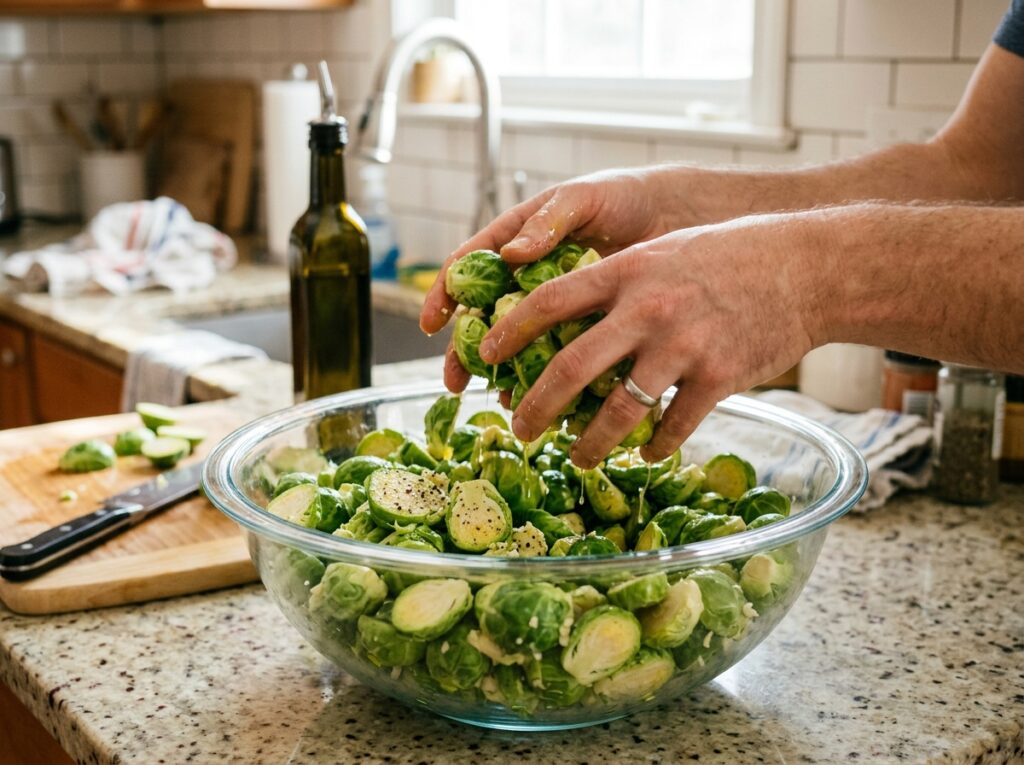
Step 2: Season and Oil
Drizzle the avocado oil over the sprouts. Use your hands to toss them until every surface is lightly coated. The goal is a thin, even film—not a puddle. Add the kosher salt and black pepper. Toss again.
Do not add the garlic yet. Fresh garlic burns at high temperatures, and we are cooking these at 400°F (204°C). The garlic comes later, after the sprouts have had time to develop their crispy exterior.
Step 3: Preheat the Air Fryer
Set your air fryer to 400°F (204°C) and let it preheat for three to four minutes. This ensures the basket is hot when the sprouts hit it, which helps prevent sticking and kickstarts the browning process immediately.
A cold basket will cause uneven cooking. The sprouts will release moisture before they start to crisp, and you will lose that critical first wave of caramelization.
Step 4: Arrange in a Single Layer
Once the air fryer is preheated, open the basket and arrange the Brussels sprouts in a single layer, cut-side down. This positioning is important. The flat, cut surface has more contact with the hot basket, which means faster and deeper caramelization. The Maillard reaction happens most aggressively where heat transfer is direct.
Leave a little space between each sprout half. If they are touching, air cannot circulate freely, and you will end up steaming them. If you have more sprouts than space, cook in two batches. Do not compromise on this.
Step 5: The First Roast
Close the basket and set the timer for ten minutes. Do not open it during this time. Let the hot air do its work. You should start to smell the caramelization around the six-minute mark—a sweet, nutty aroma that means sugars are breaking down and browning.
Step 6: The Shake
At the ten-minute mark, open the basket and give it a firm shake or use tongs to flip the sprouts. This ensures even browning on all sides. The cut surfaces should be golden brown with crispy, charred edges. If they are not there yet, close the basket and give them another two minutes.
Step 7: The Garlic Infusion
Now it is time to add the garlic. Sprinkle the minced garlic evenly over the partially roasted sprouts. Toss gently with a spatula or tongs to distribute. Close the basket and cook for another three to four minutes.
This timing is the sweet spot. The garlic will toast and become fragrant without burning. It will cling to the crispy leaves and infuse every bite with its aromatic punch. If you add it earlier, it burns. If you add it later, it stays raw. Three to four minutes at the end is perfect.
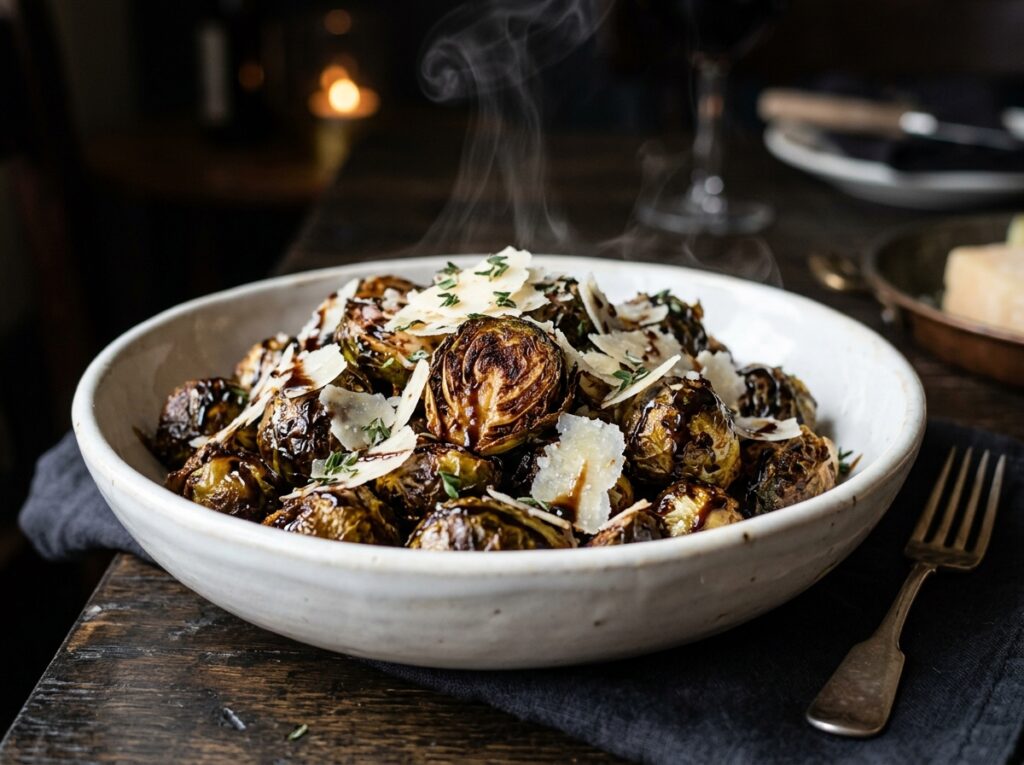
Step 8: Final Touch and Serve
Open the basket and check for doneness. The outer leaves should be deeply caramelized and crispy, almost like vegetable chips. The cores should be tender when pierced with a fork but still have some structure. If you prefer a softer texture, add one more minute.
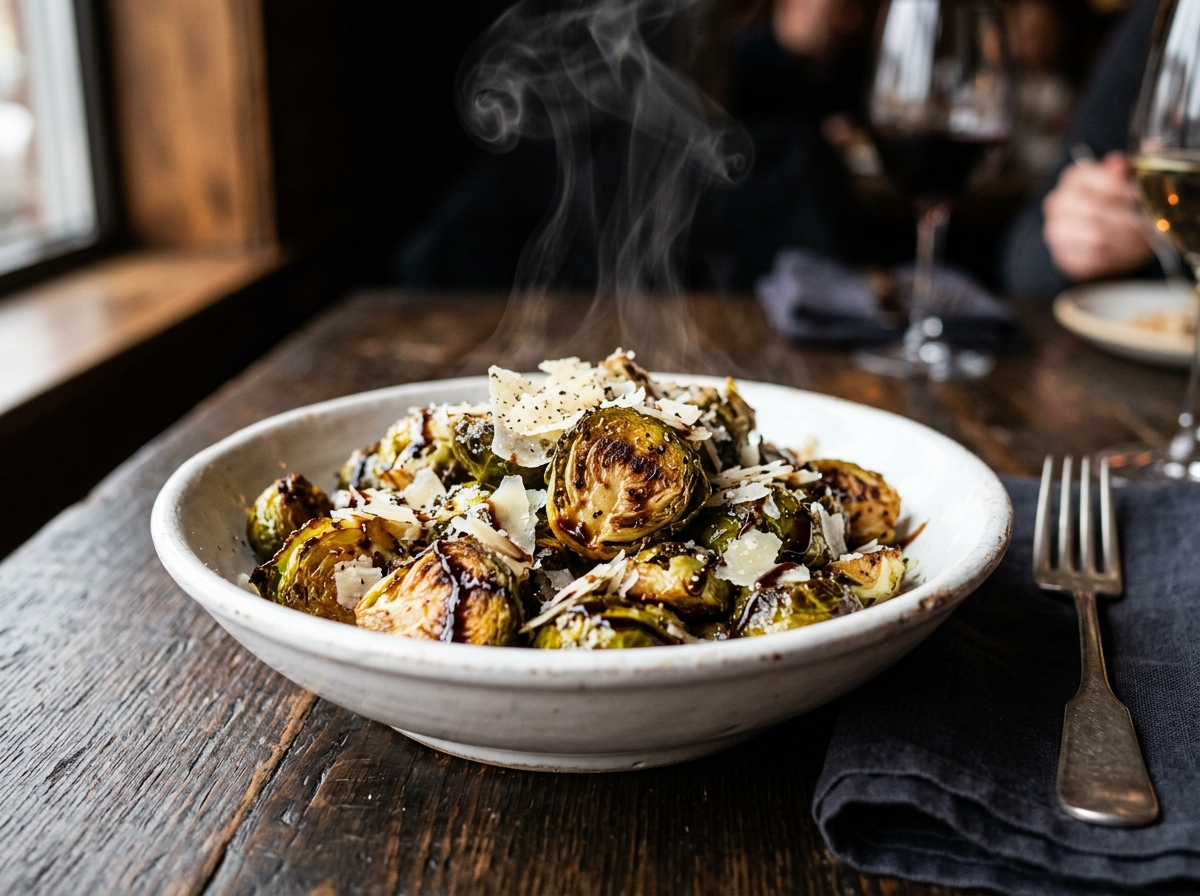
Transfer the Crispy Air Fryer Brussels Sprouts with Garlic to a serving bowl. While they are still hot, drizzle with balsamic glaze if using. Add a pinch of red pepper flakes for heat or a sprinkle of grated Parmesan for umami depth. Toss one final time, Once they are done, your Crispy Air Fryer Brussels Sprouts with Garlic are ready to be served immediately.
Crispy Air Fryer Brussels Sprouts with Garlic
Ingredients
Equipment
Method
Step 1 – Prep the Brussels Sprouts
- Rinse Brussels sprouts under cold water. Trim the tough stem ends with a sharp knife, then cut each sprout in half lengthwise. Save any loose outer leaves—they will crisp beautifully. Transfer halved sprouts to paper towels and pat completely dry. Any surface moisture will prevent crisping.
Step 2 – Season and Oil
- Transfer dried sprouts to a large mixing bowl. Drizzle with avocado oil and toss with your hands until every surface is lightly coated. Add kosher salt and black pepper. Toss again. Do NOT add garlic yet—it will burn at high heat.
Step 3 – Preheat the Air Fryer
- Set your air fryer to 400°F (204°C) and preheat for 3-4 minutes. A hot basket prevents sticking and kickstarts caramelization immediately when the sprouts make contact.
Step 4 – Arrange in Single Layer
- Once preheated, arrange Brussels sprouts in a single layer in the air fryer basket, cut-side down. This positioning maximizes contact with the hot surface for deeper caramelization. Leave space between each sprout half—crowding causes steaming instead of crisping. Cook in batches if needed.
Step 5 – First Roast
- Close the basket and cook for 10 minutes without opening. Let the Maillard reaction and caramelization work undisturbed. You’ll smell sweet, nutty aromas around the 6-minute mark—that’s the sugars breaking down and browning.
Step 6 – The Shake
- At 10 minutes, open the basket and shake firmly or use tongs to flip the sprouts. The cut surfaces should be golden brown with crispy, charred edges. If not quite there, cook another 2 minutes before proceeding.
Step 7 – Add the Garlic
- Sprinkle minced garlic evenly over the partially roasted sprouts. Toss gently to distribute. Close the basket and cook for 3-4 more minutes. This timing allows garlic to toast and become fragrant without burning. Adding it earlier causes bitter, charred garlic.
Step 8 – Final Touch and Serve
- Check for doneness—outer leaves should be deeply caramelized and crispy like chips. Cores should be tender when pierced with a fork. Transfer to a serving bowl. While hot, drizzle with balsamic glaze, add red pepper flakes, or sprinkle Parmesan. Toss once more and serve immediately.
Notes
– Air fryer cooking temp: 400°F (204°C)
– First cook phase: 10 minutes
– Garlic addition phase: 3-4 minutes
– Total cook time: 13-14 minutes
– Internal temp when done: 190°F (88°C) **Brussels Sprouts Selection:**
– Best size: 1 to 1.5 inches in diameter (medium)
– Where to buy: Trader Joe’s pre-trimmed bags, Kroger, Whole Foods
– Look for: Firm, compact heads with bright green leaves
– Avoid: Yellow leaves, soft spots, strong cabbage smell **Oil Recommendations:**
– First choice: Chosen Foods Avocado Oil (smoke point 500°F)
– Second choice: Kirkland Organic Olive Oil (smoke point 375°F)
– Application: Use spray bottle or pastry brush for thin, even coating
– Amount: 1½ tbsp max for 1 lb sprouts **Preventing Sogginess:**
– Pat sprouts completely dry after washing
– Don’t overcrowd the basket—air must circulate freely
– Don’t add garlic until final 3-4 minutes
– Don’t use too much oil (causes greasy texture)
– Always preheat the air fryer **Storage Instructions:**
– Refrigerator: Airtight container for up to 4 days
– Freezer: Freezer-safe bag for up to 2 months
– Reheat: Air fryer at 375°F for 4-5 minutes (mist with oil for crispness)
– Don’t microwave: Results in rubbery texture **Flavor Variations:**
– Maple Bacon: Toss with 1 tbsp maple syrup + crispy bacon bits
– Asian Style: Drizzle with sesame oil + soy sauce + sesame seeds
– Lemon Parmesan: Add lemon zest + grated Parmesan + black pepper
– Spicy Sriracha: Toss with sriracha mayo after cooking
– Balsamic Honey: Mix balsamic glaze + honey for sweet-savory finish **Common Mistakes:**
– Adding fresh garlic too early (burns and turns bitter)
– Not drying sprouts (moisture prevents Maillard reaction)
– Cooking from frozen without thawing (uneven cooking, excess water)
– Crowding basket (steaming instead of roasting)
– Skipping the shake/toss at 10 minutes (uneven browning)
Chef Mansoor’s Insight 💭
The Brussels sprout is proof that redemption is possible in the kitchen. For years, it suffered under the weight of bad technique and worse chemistry. Boiled into submission, stripped of color and dignity, it became the vegetable children feared and adults avoided. But give it heat, give it air, give it the chance to caramelize and crisp, and it transforms entirely. The same compound that once smelled sulfurous now tastes sweet. The same texture that once turned to mush now shatters like autumn leaves. Crispy Air Fryer Brussels Sprouts with Garlic taught me that the line between hated and beloved is often just a matter of temperature and respect.
I hope this Crispy Air Fryer Brussels Sprouts with Garlic recipe helps you rediscover this amazing vegetable
— Chef Mansoor, The Flavor Bazaar
Check the nutritional breakdown for one serving of these Crispy Air Fryer Brussels Sprouts with Garlic.
Nutrition Information (Per Serving) 📊
| Nutrient | Amount |
|---|---|
| Calories | 95 kcal |
| Protein | 4g |
| Total Fat | 6g |
| Saturated Fat | 0.5g |
| Carbohydrates | 10g |
| Dietary Fiber | 4g |
| Sugars | 3g |
| Sodium | 310mg |
| Cholesterol | 0mg |
| Vitamin C | 110% DV |
| Vitamin K | 195% DV |
Note: Nutrition values are estimates based on 1 lb (450g) Brussels sprouts with 1½ tbsp oil, serves 4. Does not include optional Parmesan or balsamic glaze.
Food Safety & Temperature Guide 🌡️
| Stage | Temperature |
|---|---|
| Air Fryer Cooking Temp | 400°F / 204°C |
| Internal Temp (Cooked Sprouts) | 190°F / 88°C (tender core) |
| Danger Zone (Do Not Hold Food) | 40°F–140°F / 4°C–60°C |
| Safe Cooling (Within 2 Hours) | Below 40°F / 4°C |
| Reheating Temp (Minimum) | 165°F / 74°C |
Important: While Brussels sprouts do not carry the same food safety risks as meat, they should not sit at room temperature for more than two hours. According to USDA guidelines, any cooked food left in the danger zone (40°F–140°F) can develop harmful bacteria.
Storage & Reheating Guide 🥡
How to store leftover Crispy Air Fryer Brussels Sprouts with Garlic.”
| Storage Method | Duration | Best Reheat Method |
|---|---|---|
| Refrigerator (cooked, in airtight container) | 4 days | Air fryer at 375°F for 4-5 minutes |
| Freezer (cooked, in freezer-safe bag) | 2 months | Thaw in fridge, reheat in air fryer at 380°F |
| Room temperature (cooked) | Do not store | Consume within 2 hours or refrigerate |
Pro Tip: To restore maximum crispness when reheating, lightly mist the sprouts with oil spray before putting them back in the air fryer. This revives the caramelization and brings back the crunch. Do not microwave—you will end up with rubber.
Frequently Asked Questions ❓
Can I use frozen Brussels sprouts?
Technically, yes, but fresh is always better. Frozen sprouts contain excess moisture that will steam rather than crisp. If you must use frozen, thaw them completely, then spread them on a towel-lined baking sheet and press firmly to remove as much water as possible. Add an extra two to three minutes to the cook time.
Do I have to cut the sprouts in half?
Cutting them in half dramatically increases surface area, which means more caramelization and crispness. Whole sprouts will cook, but they take longer and do not develop the same depth of flavor. For the best version of garlic roasted sprouts, always halve them.
What if I do not have fresh garlic?
You can substitute with garlic powder, but use it sparingly and add it after cooking. Garlic powder burns even faster than fresh garlic. Start with ½ teaspoon and toss it over the finished sprouts while they are still hot. The residual heat will bloom the flavor without scorching.
Can I add bacon or pancetta?
Absolutely. Cook the bacon or pancetta separately until crispy, then crumble it over the finished sprouts. Do not cook it in the air fryer with the vegetables—the fat will pool and make the sprouts greasy. Keep them separate and combine at the end.
How to make Crispy Air Fryer Brussels Sprouts with Garlic extra crunchy?”
Three tricks: dry them thoroughly, do not overcrowd the basket, and resist the urge to toss them too early. Let them sit undisturbed for the first ten minutes so the cut side can form a deep caramelized crust. That crust is what gives you the shatter you are looking for.
Final Tip: “Enjoy your healthy and delicious Crispy Air Fryer Brussels Sprouts with Garlic!”
You Might Also Love These Recipes 🍽️
If you enjoyed mastering the science of Crispy Air Fryer Brussels Sprouts with Garlic, here are a few more techniques and recipes from The Flavor Bazaar that will level up your meal game:
Air Fryer Salmon: The Science of the Perfect 15-Minute Recipe
For more Recipes visit: Flavourbazar.com