The Perfect Chocolate Chip Cookie: The Science of Chewy vs. Crispy
By Chef Mansoor | Flavour Bazar
The Great Cookie Debate
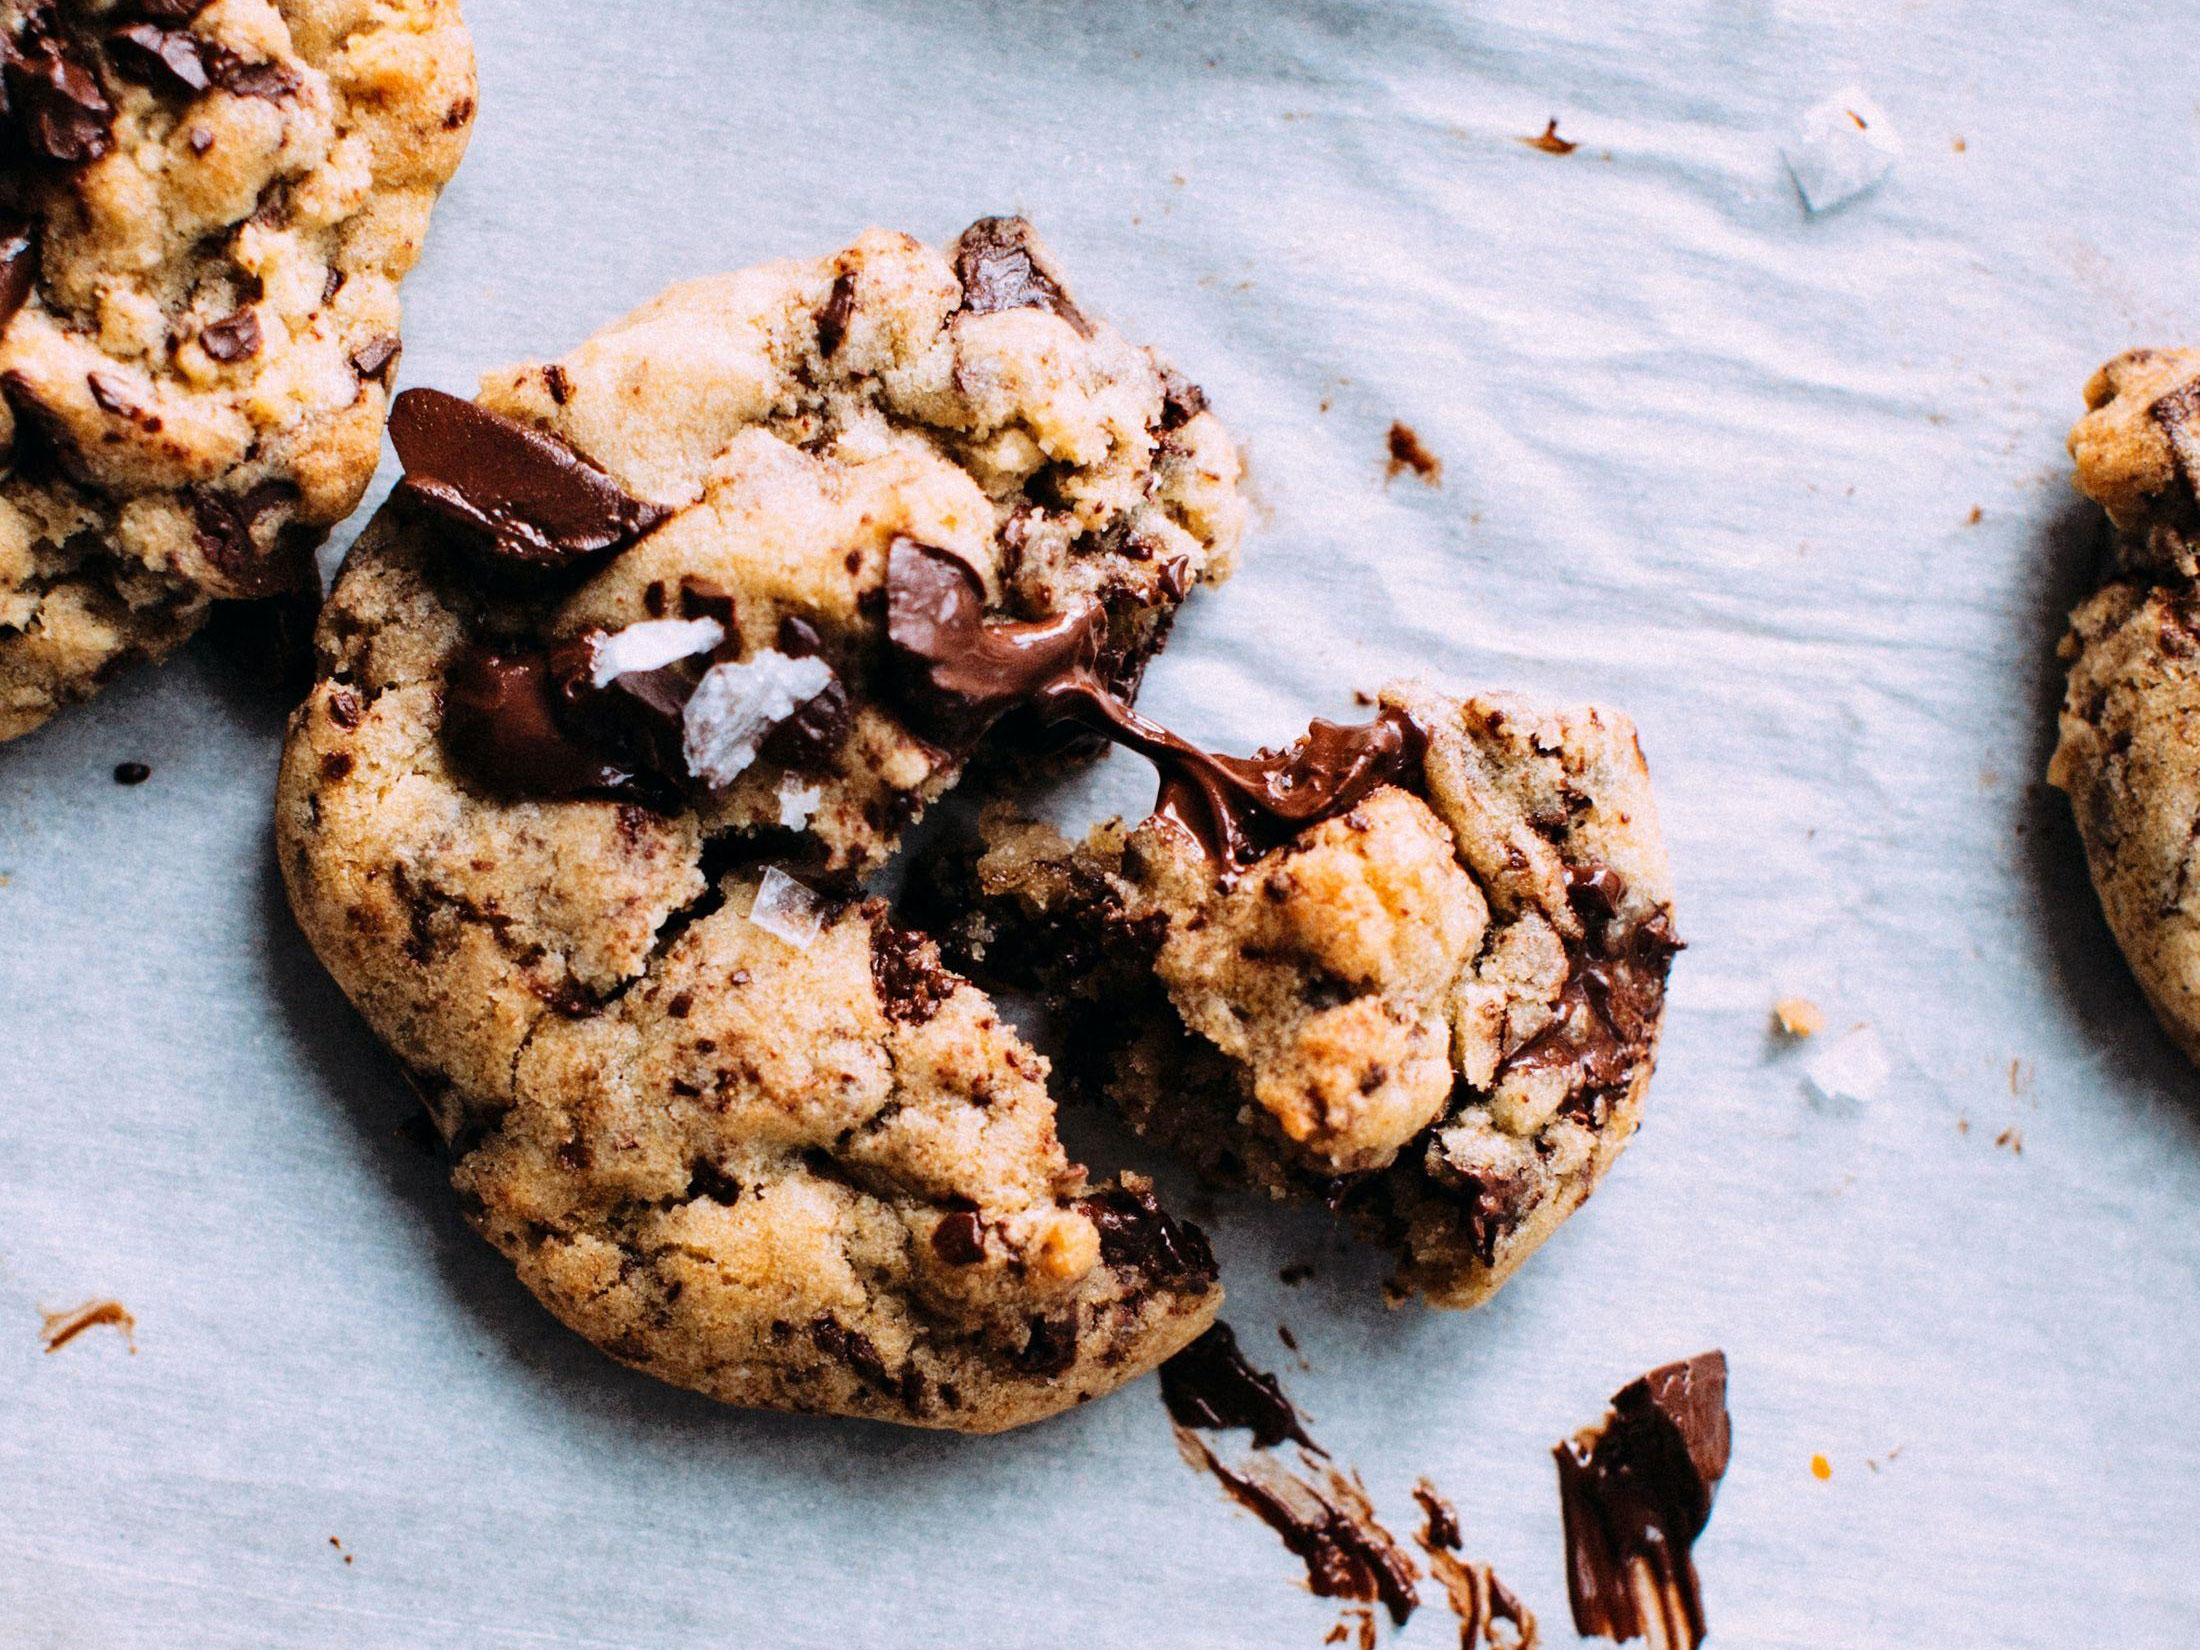
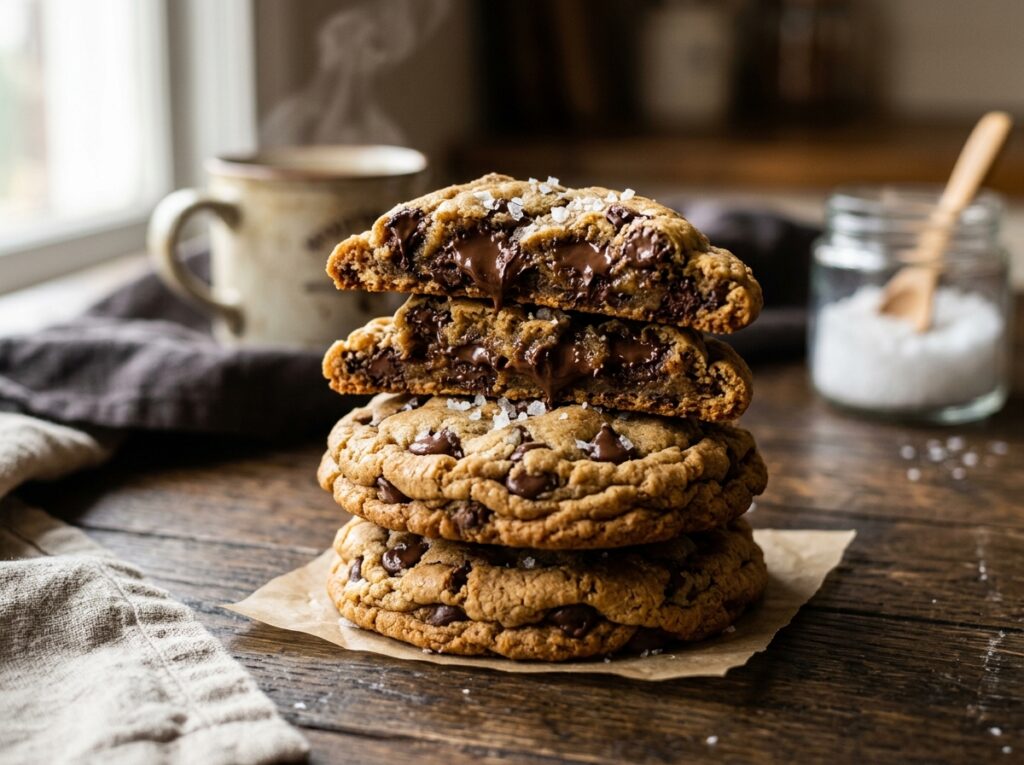
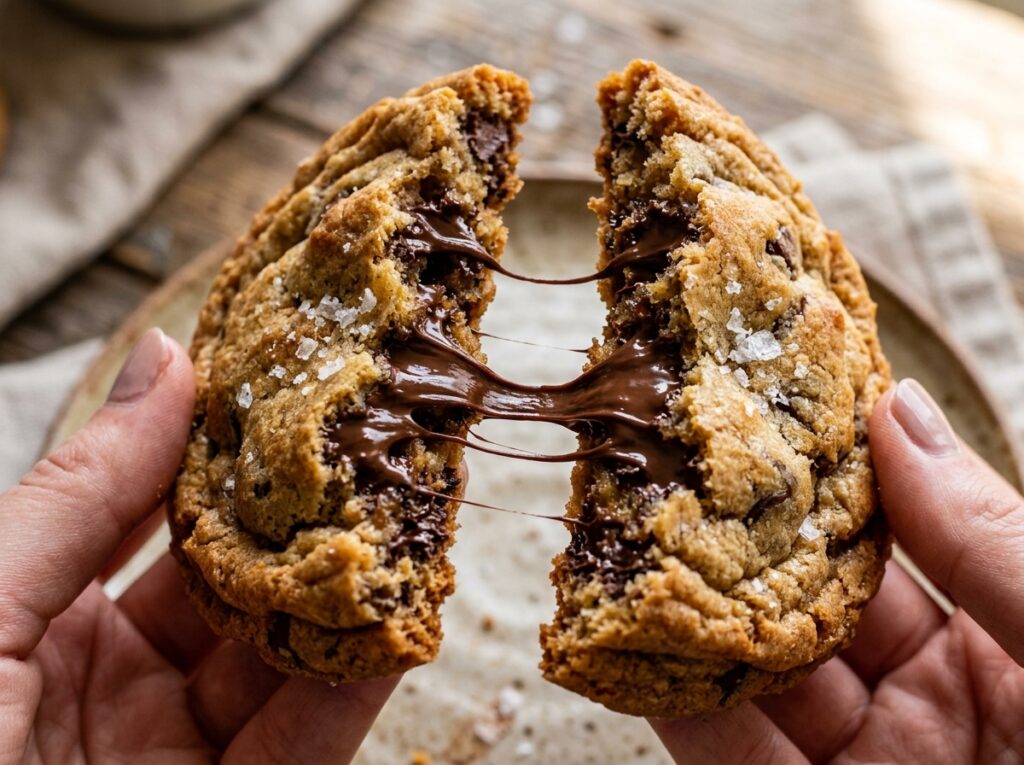
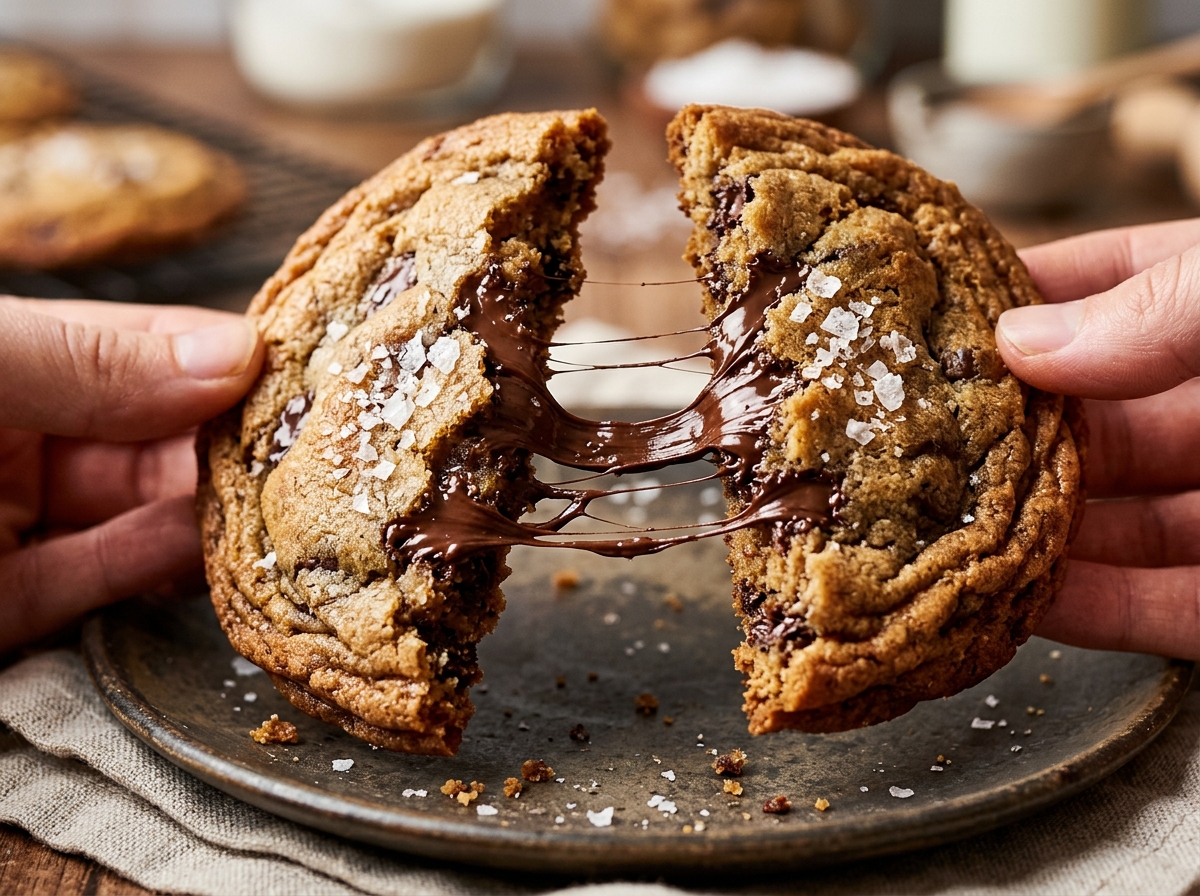
There are two kinds of people in this world: those who love thin, crispy chocolate chip cookies with lacy edges that shatter when you bite them, and those who swear by thick, chewy cookies with gooey centers that stay soft for days. And then there are those rare few who have discovered The Perfect Chocolate Chip Cookie—the one that achieves both: crispy, caramelized edges that ripple like the surface of the ocean, and a center so soft, so chewy, so impossibly rich that it tastes like it was baked five minutes ago, even three days later.
I have baked over two thousand cookies, adjusting the flour-to-sugar ratio by a single gram to find the exact formula for The Perfect Chocolate Chip Cookie that stays soft for five days straight. I have browned butter until it smelled like toasted hazelnuts, creamed sugar until it turned pale and fluffy, and chilled dough for forty-eight hours just to see what would happen. What I learned is that The Perfect Chocolate Chip Cookie is not about luck or intuition—it is about understanding how sugar ratios control texture, why brown butter adds complexity, what the twenty-four-hour chill actually does to flour hydration, and when to pull cookies from the oven even though they look dangerously underbaked.
This is not a quick weeknight recipe. The Perfect Chocolate Chip Cookie requires time, precision, and an understanding that every ingredient—from the type of flour you use to the way you measure it—plays a scientific role in the final result. But when you bite into that first warm cookie with its crispy edges and molten chocolate center, you will understand why people have been chasing this formula for nearly a century.
The Science: Sugar Ratios, Brown Butter, and the Maillard Reaction
Brown Sugar vs. White Sugar: The Texture Formula
The single most important factor in determining whether The Perfect Chocolate Chip Cookie is chewy or crispy is the ratio of brown sugar to white sugar. This is not about flavor alone—it is pure chemistry.
Brown sugar is white sugar mixed with molasses. Molasses contains glucose and fructose (simple sugars) and is hygroscopic, meaning it attracts and holds moisture from the air. When you use more brown sugar in The Perfect Chocolate Chip Cookie, the dough retains more moisture during and after baking, resulting in a soft, chewy texture that stays tender for days. Brown sugar also has a slightly lower melting point than white sugar, which means cookies spread more slowly and stay thicker.
White sugar is pure sucrose with no moisture-retaining properties. It melts quickly, allowing cookies to spread thin and crispy. White sugar also promotes caramelization at high heat, creating those beautiful golden-brown, lacy edges that crackle when you bite them.
The Perfect Chocolate Chip Cookie uses more brown sugar than white sugar (a ratio of roughly 60% brown to 40% white). This gives you the chewy center while still allowing enough spread and caramelization for crispy edges.
Brown Sugar (Moisture)+Baking Soda (pH)=Chewy Maillard Development
The Maillard Reaction: Why Color Equals Flavor
The Maillard reaction is a chemical reaction between amino acids (proteins) and reducing sugars (like glucose and fructose) that occurs at temperatures above 285°F (140°C). It is responsible for the browning and complex, nutty, caramel-like flavors in baked goods, roasted meats, and toasted bread.
In The Perfect Chocolate Chip Cookie, the Maillard reaction happens on the surface and edges where the heat is most intense. Brown sugar accelerates this reaction because it already contains reducing sugars from molasses. Adding a small amount of baking soda raises the pH of the dough slightly (makes it more alkaline), which also speeds up Maillard browning and creates deeper color and richer flavor.
This is why The Perfect Chocolate Chip Cookie has those gorgeous golden-brown edges and a deeply caramelized flavor that goes beyond simple sweetness.
Brown Butter: The Game-Changer
Most chocolate chip cookie recipes call for softened butter. The Perfect Chocolate Chip Cookie uses brown butter (beurre noisette in French). Here is what happens when you brown butter:
Butter is an emulsion of water, milk fat, and milk solids (proteins and sugars). When you heat butter in a pan, the water evaporates, and the milk solids sink to the bottom and begin to toast. As they toast, they undergo the Maillard reaction, turning golden-brown and developing nutty, caramel, almost hazelnut-like aromas and flavors. This process takes only 5–7 minutes but transforms the flavor profile of The Perfect Chocolate Chip Cookie from simple and sweet to complex, layered, and deeply satisfying.
Brown butter also affects texture. Because you have evaporated some of the water, the dough becomes slightly denser and chewier. To compensate, many bakers add a tablespoon or two of milk or water back into the browned butter once it cools.
The Twenty-Four-Hour Chill: Why The Perfect Chocolate Chip Cookie Needs Time
Dough Hydration and Flavor Concentration
This is the step most home bakers skip, and it is the single biggest mistake you can make when trying to achieve The Perfect Chocolate Chip Cookie. When you mix cookie dough, the flour is hydrated (absorbs liquid from eggs, butter, and sugar), but the process is not instant. Flour particles need time to fully absorb moisture and for the gluten proteins to relax.
When you chill cookie dough for twenty-four to seventy-two hours in the refrigerator, several things happen:
- Flour hydrates completely: The dough becomes firmer and easier to scoop. The cookies bake up with more even texture and better structure.
- Flavors concentrate and meld: The sugar begins to dissolve into the fat and liquids. The vanilla, brown butter, and chocolate flavors meld together. The dough tastes richer, more complex, and more balanced.
- Enzymatic breakdown: Enzymes in the flour and eggs break down some of the starches and proteins, creating more reducing sugars that participate in the Maillard reaction. This means deeper browning and more complex flavor.
- Controlled spread: Cold dough spreads more slowly in the oven, giving the edges time to set before the center spreads too thin. This is what creates the thick, rippled edges that define The Perfect Chocolate Chip Cookie.
Professional bakeries always chill their dough. If you want bakery-level results at home, you need to do the same.
🛒 Pro Buying Guide: Ingredients That Elevate The Perfect Chocolate Chip Cookie (USA)
Flour: Bread Flour for Extra Chew
Most recipes call for all-purpose flour, which works fine. But if you want The Perfect Chocolate Chip Cookie with extra chew, use King Arthur Bread Flour. Bread flour has higher protein content (12.7% vs. 10–11% in all-purpose), which means more gluten development. More gluten = chewier texture. You can also use a blend: 75% bread flour + 25% all-purpose for a balance of chew and tenderness.
If you prefer a softer, more tender cookie, stick with King Arthur All-Purpose Flour.
Butter: Kerrygold Grass-Fed for Browning
Kerrygold Unsalted Butter (available at Walmart, Target, Whole Foods, Trader Joe’s) has a higher butterfat content (82% vs. 80% in most American butters) and a richer, more complex flavor. This makes it ideal for browning. The grass-fed milk gives the browned butter a slightly nuttier, more golden flavor. Any unsalted stick butter works, but Kerrygold is worth the upgrade for The Perfect Chocolate Chip Cookie.
Chocolate: Guittard or Ghirardelli Chunks
Do not use cheap chocolate chips. The quality of your chocolate directly impacts the flavor of The Perfect Chocolate Chip Cookie. Guittard Super Cookie Chips or Ghirardelli Bittersweet Chocolate Chips (60% cacao) are excellent. Even better: buy Guittard or Ghirardelli chocolate bars and chop them into rough chunks. Irregular chunks create pockets of molten chocolate and give the cookies a more artisanal, bakery-style look.
Look for chocolate with real cocoa butter (not palm oil or soy lecithin fillers). Available at Whole Foods, Trader Joe’s, Target, or online.
Brown Sugar: Dark vs. Light
Light brown sugar (widely available) has about 3.5% molasses content. Dark brown sugar has about 6.5% molasses, giving it more moisture, deeper color, and a slightly more caramel-molasses flavor. For The Perfect Chocolate Chip Cookie, light brown sugar is standard, but dark brown sugar will make the cookies even chewier and richer. Use whichever you prefer.
Vanilla Extract: Nielsen-Massey Pure
Nielsen-Massey Pure Vanilla Extract (available at Whole Foods, Williams Sonoma, Amazon) is made from Madagascar bourbon vanilla beans and has a clean, rich, complex flavor. Avoid imitation vanilla—it tastes flat and chemical. Real vanilla extract makes a noticeable difference in The Perfect Chocolate Chip Cookie.
Salt: Flaky Finishing Salt
Use fine sea salt or kosher salt in the dough for structure and flavor balance. But for the finishing touch, sprinkle Maldon Sea Salt or Jacobsen Flaky Salt on top of the cookies right after they come out of the oven. The flaky crystals add bursts of salinity that contrast beautifully with the sweet chocolate and caramelized dough.
Tools: Silpat Mat and Cookie Scoop
A Silpat Silicone Baking Mat (or parchment paper) prevents sticking and promotes even browning. A cookie scoop (2-tablespoon size, about 1.5 oz / 43g) ensures every cookie is the exact same size, which means they bake evenly and look professional. Available at Target, Amazon, Williams Sonoma.
📊 Ingredients Table (US Customary + Metric)
| Ingredient | US Customary | Metric |
|---|---|---|
| Unsalted butter (for browning) | 1 cup (2 sticks) | 227g |
| Light brown sugar, packed | 1 cup | 200g |
| Granulated white sugar | 1/2 cup | 100g |
| Large eggs, room temperature | 2 | 2 |
| Vanilla extract | 2 teaspoons | 10ml |
| All-purpose flour OR bread flour | 2 1/4 cups | 270g |
| Baking soda | 1 teaspoon | 5g |
| Fine sea salt | 1 teaspoon | 6g |
| High-quality chocolate chips or chunks | 2 cups | 340g |
| Flaky sea salt (for finishing) | For sprinkling | For sprinkling |
Optional Add-Ins:
- 1 cup toasted walnuts or pecans, chopped (120g)
- 1/2 cup toffee bits (85g)
Yield: 24 large cookies (3-inch diameter)
Prep Time: 20 minutes (plus 24-hour chill)
Bake Time: 12–14 minutes
Total Time: 24 hours 35 minutes
⚠️ Common Mistakes Table (8 Mistakes That Ruin The Perfect Chocolate Chip Cookie)
| The Mistake | What Actually Happens | The Fix |
|---|---|---|
| Measuring flour with a cup instead of a scale | Scoop-and-pack adds 20–30% more flour; cookies turn dry and cakey | Weigh flour on a digital scale (270g = 2 1/4 cups); or spoon-and-level method |
| Using warm or melted butter when recipe needs creamed | Cookies spread too thin and turn greasy; lose structure | Brown butter must cool to room temp before creaming with sugar |
| Over-baking (cookies should look slightly raw in center) | Cookies turn dry, hard, and crumbly instead of chewy | Pull cookies when edges are set and centers look underdone; they finish on pan |
| Using cheap chocolate with fillers | Chocolate tastes waxy, flat, and doesn’t melt properly | Use Guittard, Ghirardelli, or Valrhona with real cocoa butter |
| Skipping the salt | Cookies taste flat, one-dimensional, overly sweet | Salt enhances sweetness and balances flavor; use 1 tsp in dough + flaky salt on top |
| Not chilling dough for 24 hours | Cookies spread too much; flavors taste underdeveloped | Chill dough 24–72 hours for hydration, flavor concentration, controlled spread |
| Baking all cookies on one overcrowded sheet | Uneven heat circulation; cookies bake unevenly and touch/merge | Bake 6–8 cookies per sheet; space 3 inches apart |
| Using old baking soda | No rise, no spread control; cookies stay dense and flat | Check expiration date; baking soda loses potency after 6 months once opened |
🔪 Step-by-Step Method: Mastering The Perfect Chocolate Chip Cookie (Prose Only)
Step 1: The Butter Browning (Building Nutty Complexity)
Cut one cup (two sticks) of unsalted butter into tablespoon-sized pieces for even melting. Place the butter in a light-colored saucepan (so you can see the color changing) over medium heat. Stir occasionally as the butter melts, foams, and begins to bubble. Watch carefully.
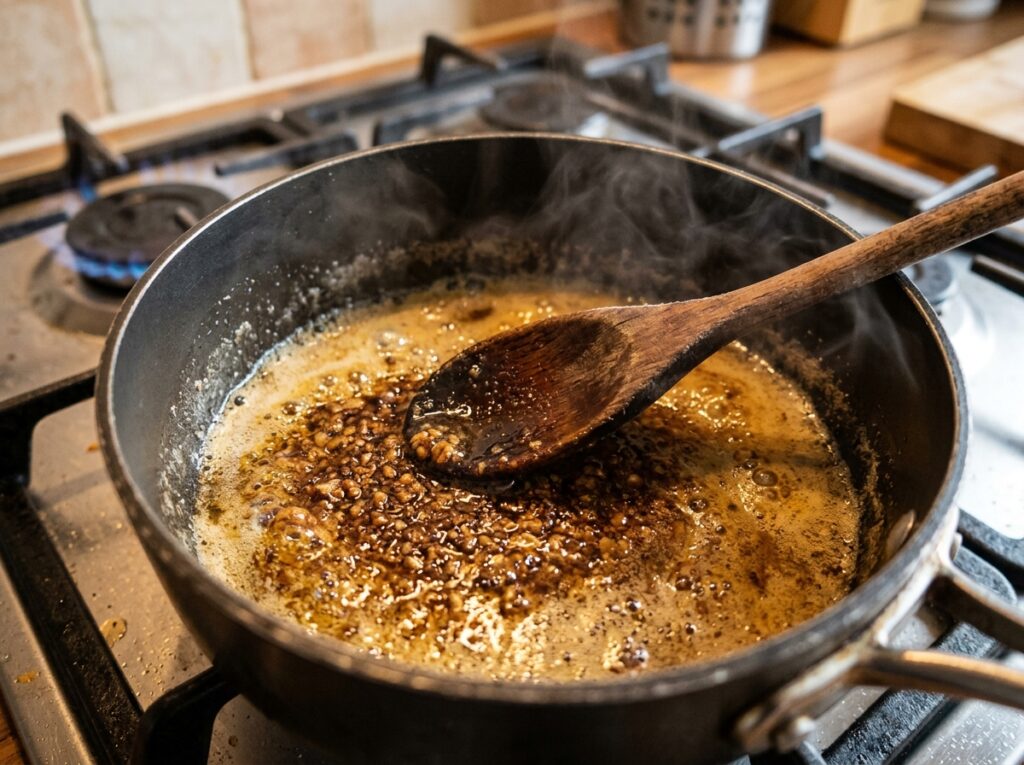
The water in the butter will evaporate with a vigorous bubbling sound. As the bubbling subsides, the milk solids at the bottom of the pan will begin to brown.
You will see them turn from white to golden to deep amber-brown, and the butter will smell intensely nutty and toasty—like hazelnuts or toasted caramel. This takes 5–7 minutes total.
The moment the milk solids are deep golden-brown and smell nutty (not burnt), immediately remove the pan from heat and pour the browned butter into a heatproof bowl to stop the cooking.
Let it cool to room temperature (about 30–45 minutes) or speed up the process by refrigerating for 15–20 minutes until it is soft and pliable but not solid. The butter should be the consistency of softened butter—cool to the touch but spreadable.
Step 2: The Sugar Creaming (Incorporating Air for Lift)
In the bowl of a stand mixer fitted with the paddle attachment (or in a large bowl with a hand mixer), combine the cooled brown butter, one cup packed light brown sugar, and half a cup granulated white sugar.
Beat on medium speed for 3–4 minutes until the mixture is light, fluffy, and pale in color.
This process is called creaming, and it incorporates air into the fat and sugar, creating tiny air pockets that will expand during baking and give The Perfect Chocolate Chip Cookie lift and structure.
Scrape down the sides of the bowl halfway through. Add two room-temperature eggs one at a time, beating well after each addition until fully incorporated. Add two teaspoons vanilla extract and beat until smooth. The mixture should look creamy, slightly glossy, and homogeneous.
Step 3: The Dry Ingredient Fold (Minimal Gluten Development)
In a separate medium bowl, whisk together two and one-quarter cups flour (all-purpose or bread flour—your choice based on desired chew level), one teaspoon baking soda, and one teaspoon fine sea salt.
Whisk for 30 seconds to evenly distribute the leavening and salt. Add the dry ingredients to the wet ingredients all at once. Using a wooden spoon, rubber spatula, or the mixer on the lowest speed, stir or mix just until no dry flour streaks remain.
Do not overmix. Overmixing develops gluten, which makes The Perfect Chocolate Chip Cookie tough and cakey instead of tender and chewy.
The dough should look slightly rough and barely combined. Fold in two cups chocolate chips or chunks using the spatula, distributing them evenly throughout the dough. If adding nuts or toffee, fold them in now as well.
Step 4: The Twenty-Four-Hour Chill (Hydration and Flavor Concentration)
Cover the bowl of dough tightly with plastic wrap and refrigerate for at least twenty-four hours. Yes, this is a long time.
Yes, it is worth it. You can chill the dough for up to seventy-two hours for even deeper flavor. During this time, the flour fully hydrates, the flavors meld and concentrate, and the dough firms up, making it easier to scoop and shape.
The cold dough also spreads more slowly in the oven, which is what creates the thick, rippled edges that make The Perfect Chocolate Chip Cookie look bakery-professional.
If you absolutely cannot wait twenty-four hours, chill for at least four hours. But know that the flavor and texture will not be as developed.
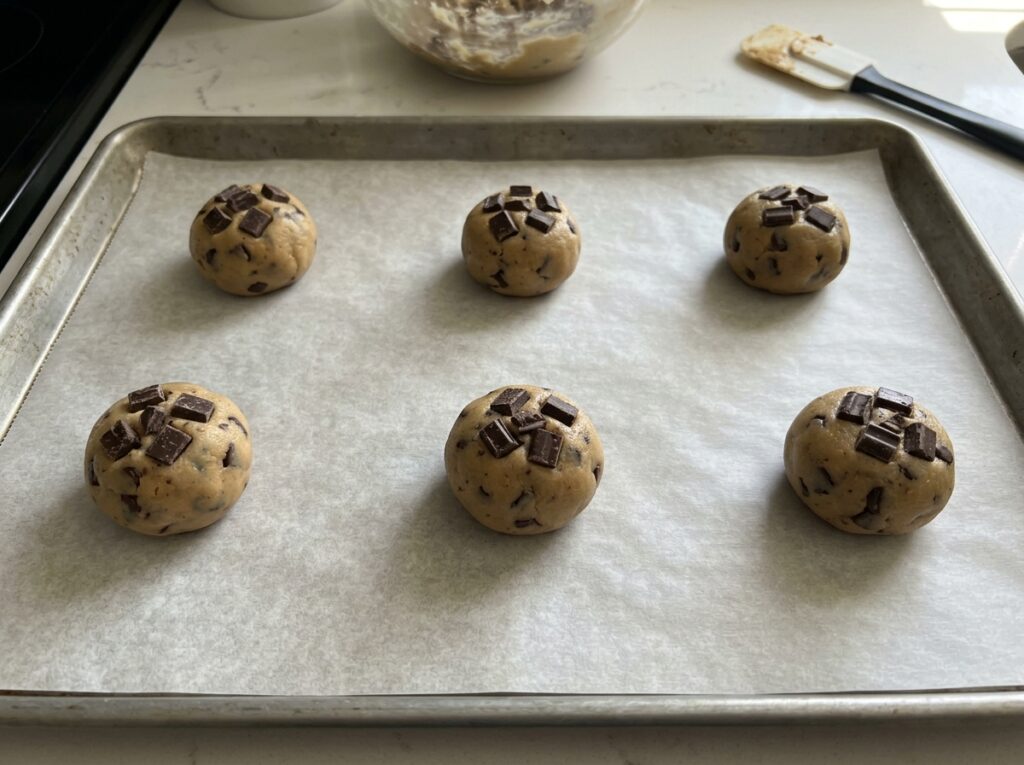
Step 5: Scooping and Shaping (Uniform Size for Even Baking)
Preheat your oven to 350°F (175°C) and line two large baking sheets with Silpat mats or parchment paper. Remove the chilled dough from the refrigerator. It will be very firm—almost hard. Using a 2-tablespoon cookie scoop (or a spoon and your hands), scoop portions of dough and roll them gently between your palms into smooth balls.
Do not flatten them—leave them as tall, round balls. Place 6–8 dough balls per baking sheet, spacing them at least 3 inches apart (they will spread significantly). For extra visual appeal and pockets of molten chocolate, press a few extra chocolate chunks into the top of each dough ball before baking.
Step 6: Baking to Perfection (The Underdone Pull)
Bake one sheet at a time on the center oven rack for 12–14 minutes. This is the hardest part: you must pull the cookies when the edges are set and golden-brown but the centers still look pale, puffy, and slightly underdone.
They should look like they need another 2 minutes. Trust the science. The cookies will continue cooking on the hot baking sheet after you remove them from the oven (carryover cooking), and the centers will set as they cool.
If you wait until the centers look fully baked, they will be overbaked and dry by the time they cool.
The moment you pull the cookies from the oven, immediately sprinkle a few flakes of Maldon sea salt on top of each one while they are still hot and soft.
Let the cookies cool on the baking sheet for 5 minutes (they are too soft to move immediately), then transfer them to a wire rack to cool completely. Repeat with the remaining dough.
The Perfect Chocolate Chip Cookie
Ingredients
Equipment
Method
- Cut 1 cup (2 sticks) unsalted butter into tablespoon-sized pieces for even melting. Place the butter pieces in a light-colored saucepan (so you can easily see the color changing as it browns) over medium heat. Stir occasionally with a wooden spoon or silicone spatula as the butter melts completely. The butter will begin to foam vigorously as the water content evaporates—this is normal. Continue heating, stirring frequently to prevent the milk solids from sticking to the bottom. As the vigorous bubbling subsides (meaning most of the water has evaporated), watch the color of the milk solids at the bottom of the pan carefully. They will transition from white to golden to deep amber-brown. You will notice an intensely nutty, toasted aroma—like hazelnuts or caramel. This entire process takes 5-7 minutes. The moment the milk solids are deep golden-brown and smell nutty (not burnt—there is a fine line), immediately remove the pan from heat and pour the browned butter into a large heatproof bowl to stop the cooking process. Scrape all the brown bits from the bottom of the pan—that’s where the flavor lives. Let the browned butter cool at room temperature for 30-45 minutes until it reaches room temperature and is the consistency of softened butter (pliable but not melted). You can speed this up by refrigerating for 15-20 minutes, stirring occasionally. The butter should be soft and spreadable, not solid or liquid.
- Once the brown butter has cooled to room temperature and is soft and spreadable, transfer it to the bowl of a stand mixer fitted with the paddle attachment (or use a large mixing bowl with a hand mixer). Add 1 cup packed light brown sugar and 1/2 cup granulated white sugar. Beat on medium speed for 3-4 minutes, scraping down the sides of the bowl halfway through, until the mixture is light in color, fluffy, and creamy. This process is called creaming, and it incorporates thousands of tiny air bubbles into the fat-sugar matrix. These air pockets will expand during baking, giving The Perfect Chocolate Chip Cookie lift and a tender crumb structure. Add 2 room-temperature eggs one at a time, beating well after each addition until fully incorporated and the mixture looks smooth and homogeneous. Add 2 teaspoons vanilla extract and beat until just combined. The mixture should look creamy, glossy, and pale.
- In a separate medium bowl, whisk together 2 1/4 cups flour (all-purpose for tender cookies, OR bread flour for extra-chewy texture—your choice), 1 teaspoon baking soda, and 1 teaspoon fine sea salt. Whisk thoroughly for 20-30 seconds to ensure even distribution of the leavening agent and salt. Add the entire bowl of dry ingredients to the wet ingredients all at once. Using a wooden spoon, rubber spatula, or the mixer on the absolute lowest speed, mix just until no visible dry flour streaks remain. Do NOT overmix. Overmixing develops gluten strands, which will make The Perfect Chocolate Chip Cookie tough, cakey, and dense instead of tender and chewy. The dough should look slightly rough and shaggy—this is correct. Stop mixing the moment the flour disappears.
- Add 2 cups high-quality chocolate chips or hand-chopped chocolate chunks to the dough. Using a sturdy rubber spatula, fold the chocolate into the dough with 8-10 gentle strokes, distributing the chocolate pieces evenly throughout. If adding optional toasted nuts or toffee bits, fold them in now as well. The dough will be thick, slightly sticky, and studded with chocolate. Do not overmix at this stage—gentle folding preserves the tender texture.
- Cover the bowl of cookie dough tightly with plastic wrap, pressing the plastic directly onto the surface of the dough to prevent it from drying out. Refrigerate for a MINIMUM of 24 hours. For even deeper, more complex flavor, you can chill the dough for up to 72 hours (3 days). During this extended refrigeration period, several critical transformations occur: (1) The flour fully hydrates—absorbs all available moisture from eggs, butter, and sugar—creating a firmer, more cohesive dough that scoops cleanly and bakes with better structure. (2) Flavors meld and concentrate—the vanilla, brown butter, chocolate, and caramelized sugar notes blend together, creating a more harmonious, bakery-level flavor profile. (3) Enzymatic breakdown—natural enzymes in the flour and eggs break down starches and proteins, creating more reducing sugars that participate in Maillard browning, resulting in deeper color and more complex caramel notes. (4) Cold dough spreads more slowly in the oven, allowing edges to set before the center spreads too thin, creating the signature thick, rippled edges that define The Perfect Chocolate Chip Cookie. This step is NOT optional. If you skip or shorten it, your cookies will spread too much, lack depth of flavor, and miss the bakery-quality texture that makes this recipe special.
- When you’re ready to bake (after the 24-72 hour chill), preheat your oven to 350°F (175°C). Position racks in the upper-middle and lower-middle positions if baking two sheets at once, or center rack if baking one sheet at a time. Line two large baking sheets with Silpat silicone baking mats or parchment paper. Do not grease the mats or paper—the cookies have enough butter and will not stick.
- Remove the chilled cookie dough from the refrigerator. It will be very firm—almost rock-hard. This is correct. Using a 2-tablespoon cookie scoop (also called a #40 scoop, roughly 1.5 oz / 43g capacity), scoop level portions of the cold dough. If you don’t have a scoop, use a spoon to portion roughly 2 tablespoons of dough and use your hands to roll it into a ball. The dough will be very firm and may crack slightly as you roll—that’s fine. Roll each portion between your palms briefly to form a smooth, round ball. Do NOT flatten the dough balls—leave them tall and spherical for maximum thickness after baking. Place 6-8 dough balls per baking sheet, spacing them at least 3 inches apart in all directions (they will spread significantly during baking). For extra visual appeal and pockets of melted chocolate, press 3-4 additional chocolate chips or chunks into the top of each dough ball just before baking.
- Bake one sheet at a time on the center oven rack for 12-14 minutes. This is the hardest and most critical step: you MUST remove the cookies from the oven when the edges are set, golden-brown, and slightly firm, but the centers still look pale, puffy, slightly wet, and UNDERDONE. The centers should look like they need another 2 minutes of baking. This seems wrong, but it is scientifically correct. The cookies will continue cooking via carryover heat on the hot baking sheet after you remove them from the oven. The centers will set and firm up as they cool. If you wait until the centers look fully baked and golden, they will be overbaked, dry, crumbly, and hard by the time they cool to room temperature. Pull early. Trust the process.
- The INSTANT you pull the baking sheet from the oven, while the cookies are still hot, soft, and glistening, sprinkle a small pinch of flaky sea salt (Maldon, Jacobsen, or similar) on top of each cookie. The salt crystals will stick to the soft surface and create beautiful sparkle and bursts of salinity that contrast with the sweet chocolate. Let the cookies cool on the baking sheet for exactly 5 minutes—they are too soft and fragile to move immediately. After 5 minutes, use a thin spatula to carefully transfer the cookies to a wire cooling rack to cool completely. As they cool, the edges will firm up and become crispy while the centers stay soft and chewy. Repeat the scooping and baking process with the remaining dough. If baking multiple batches, let the baking sheet cool completely between batches (or use a second cool sheet) to prevent uneven spreading.
- Once cookies are completely cool, store them in an airtight container at room temperature. Thanks to the high brown sugar content (which is hygroscopic and retains moisture), The Perfect Chocolate Chip Cookie will stay soft and chewy for 5-7 days. Place a sheet of parchment paper between layers to prevent sticking. Do not refrigerate baked cookies—they will firm up and dry out. If cookies do firm up slightly after a few days, warm them in a 300°F oven for 3-4 minutes or microwave for 8-10 seconds to restore softness.
Notes
🧘♂️ Chef Mansoor’s Insight
I have spent most of my professional life chasing complexity—sous vide precision, molecular foams, eighteen-ingredient reductions. But the recipe that humbles me most is the chocolate chip cookie. A handful of ingredients.
A process so simple a child can do it. And yet the difference between good and transcendent comes down to grams of flour, minutes of browning butter, and the discipline to wait twenty-four hours when you want to eat them now.
The Perfect Chocolate Chip Cookie is a masterpiece of engineering disguised as casual comfort food. It is memory made edible—the smell of your grandmother’s kitchen, the first thing you learned to bake, the taste of home.
Every time I pull a batch from the oven, I am reminded that greatness is not always about more. Sometimes it is about doing the simple things with such care and precision that they become extraordinary.
📊 Nutrition Table (Per Cookie, 24 Cookies)
| Nutrient | Amount |
|---|---|
| Calories | 220 kcal |
| Total Carbohydrates | 28g |
| Total Sugars | 18g |
| Dietary Fiber | 1g |
| Protein | 3g |
| Total Fat | 11g |
| Saturated Fat | 7g |
| Cholesterol | 35mg |
| Sodium | 180mg |
| Calcium | 2% DV |
| Iron | 6% DV |
Estimates based on USDA data for homemade cookies with butter, flour, brown sugar, and chocolate. Values vary with specific chocolate brand and optional add-ins.
🌡️ Food Safety & Baking Temperature Guide
Safe minimum internal temperature for eggs (fully baked cookies): 160°F (71°C) — cookies should be baked through with no raw dough
Ideal oven temperature for The Perfect Chocolate Chip Cookie: 350°F (175°C)
Bake time: 12–14 minutes (edges set, centers look slightly underdone)
Danger zone (do not hold): 40°F–140°F (4°C–60°C)
Raw dough safety: Contains raw eggs and flour; do not consume unbaked dough
Cooling time: 5 minutes on baking sheet, then transfer to wire rack
Storage: Airtight container at room temperature up to 5 days
🧊 Storage & Freezing Guide
| Storage Method | Duration | Best Practice |
|---|---|---|
| Room temperature (airtight container) | 5–7 days | Store with parchment between layers; stays chewy thanks to brown sugar |
| Refrigerator (airtight) | 2 weeks | Cookies firm up when cold; bring to room temp or warm 10 sec in microwave |
| Freezer (baked cookies) | 3 months | Wrap individually in plastic, then foil; thaw at room temp or warm in oven |
| Freezer (unbaked dough balls) | 3 months | Freeze on tray, then transfer to freezer bag; bake from frozen, add 2 min |
Pro Tip: Freeze scooped dough balls on a baking sheet until solid, then transfer to a freezer bag. Bake from frozen at 350°F for 14–16 minutes. Fresh-baked cookies anytime you want them.
❓ Frequently Asked Questions
Can I make The Perfect Chocolate Chip Cookie without browning the butter?
Yes, but you will lose the nutty, caramelized complexity that brown butter adds. Use softened (not melted) butter and cream it with the sugars for 4–5 minutes. The cookies will still be good but less complex in flavor.
Why do I need to chill the dough for 24 hours?
Chilling allows flour to fully hydrate, flavors to concentrate and meld, and dough to firm up for controlled spreading. Cold dough spreads slower, creating thick cookies with rippled edges. If you skip this, cookies will be thinner, less flavorful, and spread too much.
Can I use all brown sugar or all white sugar?
All brown sugar makes cookies very chewy, thick, and soft but they won’t spread much and may taste too molasses-forward. All white sugar makes cookies thin, crispy, and crunchy with no chew. The 60/40 brown-to-white ratio in The Perfect Chocolate Chip Cookie balances chew and crisp.
What’s the difference between bread flour and all-purpose flour?
Bread flour has higher protein (12.7% vs. 10-11%), which creates more gluten and results in chewier cookies. All-purpose gives a slightly more tender, less chewy texture. Both work—choose based on your texture preference.
Why do my cookies turn out flat and greasy?
Most common causes: (1) Butter was too warm when mixed, (2) Dough was not chilled long enough, (3) Oven temperature too low, (4) Too much butter or not enough flour. Always weigh flour (270g) and chill dough 24 hours minimum.
When should I pull the cookies from the oven?
When edges are set and golden-brown but centers still look pale, puffy, and slightly underdone. They should look like they need 2 more minutes. They will finish cooking on the hot pan via carryover heat. Overbaking = dry, crumbly cookies.
Can I add nuts or other mix-ins?
Yes. Fold in up to 1 cup toasted walnuts, pecans, or toffee bits along with the chocolate chips. Do not exceed 3 cups total mix-ins or the cookies will fall apart.
Why does the recipe call for both baking soda and no baking powder?
Baking soda (sodium bicarbonate) raises the pH of the dough, which speeds up Maillard browning and creates deeper color and flavor. It also reacts with the acidic brown sugar to produce some CO2 lift. Baking powder is not needed because we want controlled spread, not excessive rise.
🔗 More from Flavour Bazar
If The Perfect Chocolate Chip Cookie won your heart, explore these other science-driven baking recipes:
Blueberry Buttermilk Pancakes: The Science of the Fluff
Master acid-base leavening chemistry
Strawberry Shortcake: The Science of the Perfect Crumb
Learn fat-gluten interaction in biscuits
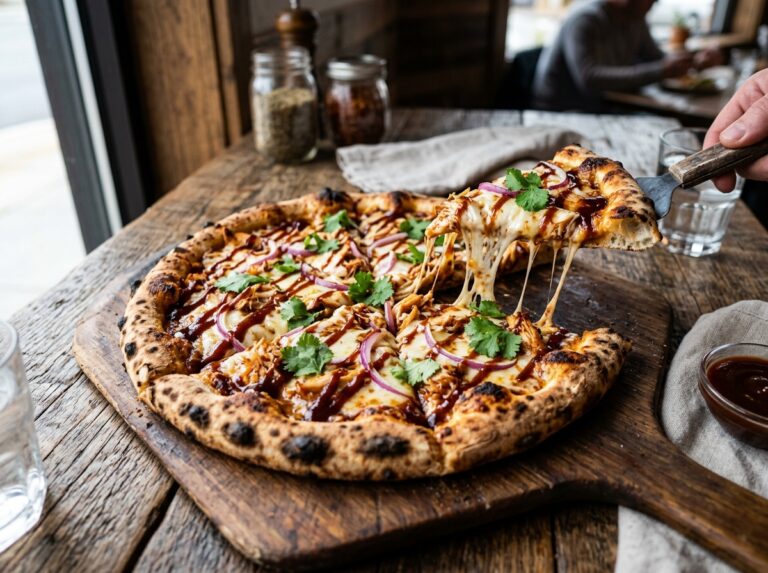
The BEST BBQ Chicken Pizza: The Science of the Smoky Slice
Dough fermentation and high-heat baking
Buttermilk Biscuits: The Science of Flaky Layers — Deep dive into lamination and cold fat technique
Outbound Link (Authority Building):
🔬 Types of Sugar Used in American Baking (King Arthur Guide) — Comprehensive guide to granulated, brown, powdered, and specialty sugars
For More Healthy Recipes Visit: flavourbazar.com