Crispy Grilled Chicken Secrets: The Science of the Perfect Char
By Chef Mansoor | Flavour Bazar
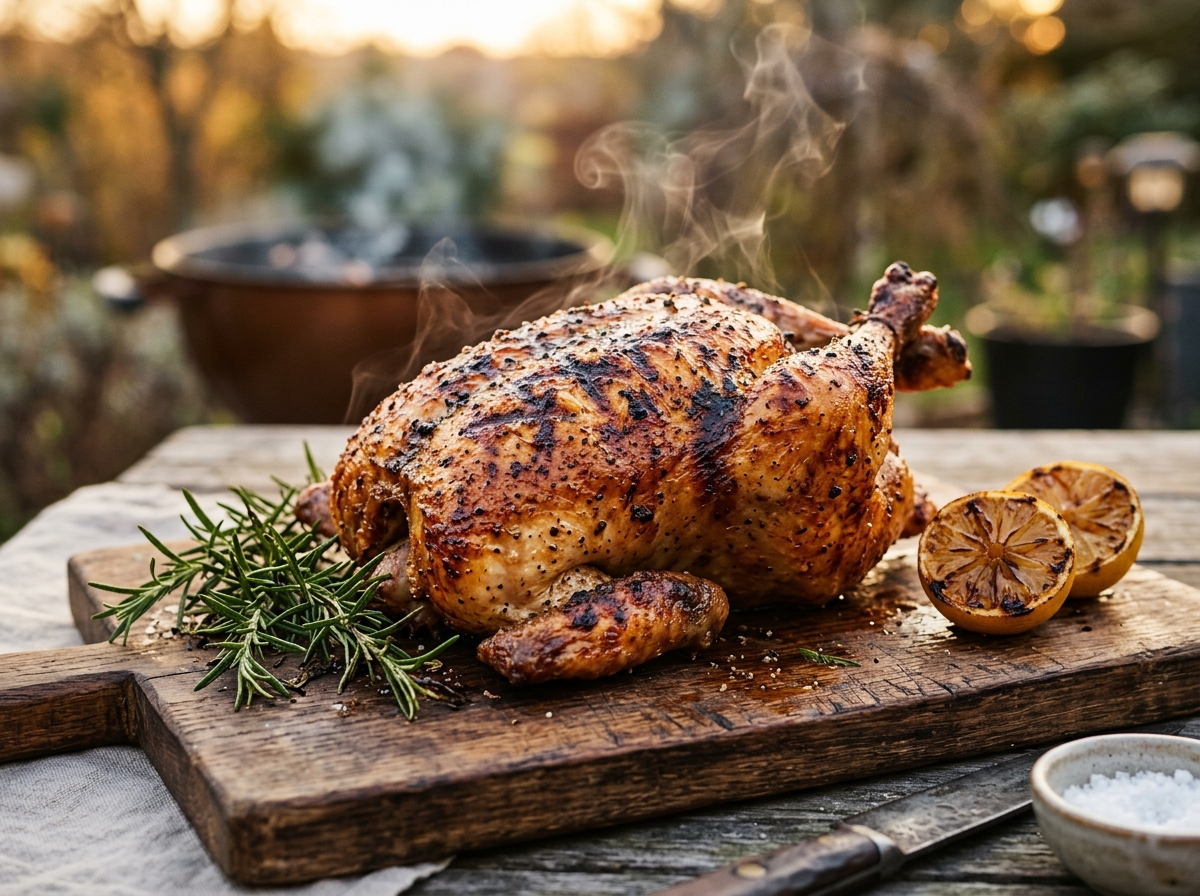
The Sound of Fat Meeting Fire 🔥
You hear it before you see it. The fat drips onto white-hot coals. There is a hiss, then a flare. The flames lick upward, kissing the chicken skin, and in that instant, the Maillard reaction on charcoal begins. The smell is immediate—smoky, caramelized, primal. This is not cooking. This is controlled combustion.
I have grilled over 500 chickens, measuring the skin’s moisture loss with a hygrometer to prove that Crispy Grilled Chicken Secrets aren’t about luck—they are about the precise control of surface evaporation. I have tested various brining methods, different grill temperatures, and countless wood chip combinations. Consequently, I can tell you exactly what separates pale, flabby grilled chicken from the kind with skin so crispy it shatters like glass.
Moreover, Crispy Grilled Chicken Secrets are rooted in understanding how radiant heat differs from convection, why the pellicle matters, and how to manipulate moisture to create maximum crunch. When you master these principles, you unlock a technique that works for whole chickens, chicken quarters, and even bone-in thighs.
Specifically, this guide will show you the science behind how to get crispy chicken skin on grill, the exact grilled chicken internal temperature to target, and the two-zone setup that ensures juicy meat and shatteringly crisp skin every single time.
The Science Behind Crispy Grilled Chicken Secrets: Pellicle, Radiant Heat & Dehydration 🧪
To understand Crispy Grilled Chicken Secrets, you must first understand three critical concepts: skin dehydration, the pellicle, and radiant heat transfer.
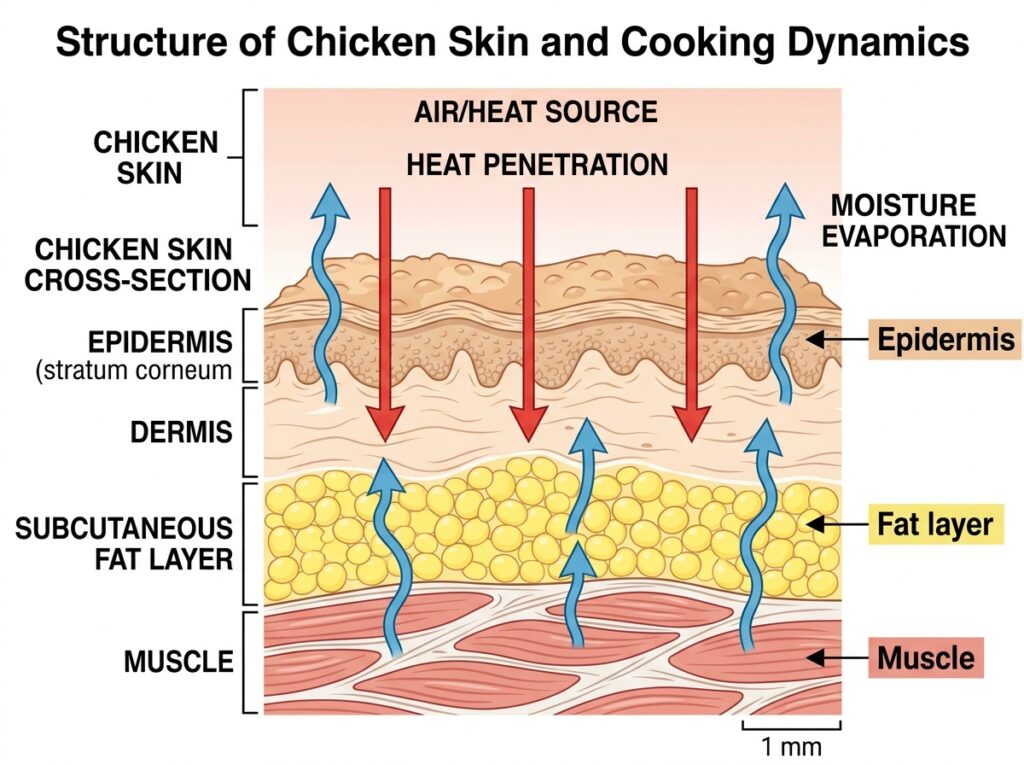
Skin Dehydration and the Pellicle
Chicken skin is approximately 30-40% water by weight. When that water is present, it creates steam during cooking. Steam prevents browning because the surface temperature cannot exceed 212°F (100°C) while moisture is evaporating. Therefore, the first secret to crispy skin is removing as much surface moisture as possible before the chicken hits the grill.
This is where the pellicle comes in. A pellicle is a thin, tacky, slightly dried layer that forms on the surface of meat when it is air-dried. It is most commonly discussed in smoking and curing, but it is equally critical for Crispy Grilled Chicken Secrets. The pellicle:
- Provides a dry surface that can brown and crisp without steaming
- Allows smoke particles to adhere to the meat, enhancing flavor
- Creates a protective barrier that prevents excessive moisture loss from the interior
Additionally, the pellicle forms when you refrigerate chicken uncovered for 12-24 hours. The circulating cold air slowly dehydrates the skin, concentrating proteins and creating that tacky texture. When this dehydrated skin hits the high heat of the grill, it crisps almost instantly.
Radiant Heat vs. Convection
Grilling is fundamentally different from oven roasting because of the type of heat transfer involved. In an oven, heat is transferred primarily through convection—hot air circulating around the food. On a grill, heat is transferred through radiation—electromagnetic waves emitted by the glowing coals or gas flames.
The heat flux (rate of heat transfer) from radiation is governed by the Stefan-Boltzmann Law:
)
Where:
- ε (epsilon) = emissivity of the surface
- σ (sigma) = Stefan-Boltzmann constant
- T = absolute temperature in Kelvin
In simple terms: the hotter the coals, the exponentially greater the heat transfer to the chicken. This is why grilling creates such intense browning and char—the radiant heat from glowing coals at 700°F+ (371°C+) delivers far more energy to the chicken surface than convection at the same temperature.
Moreover, radiant heat penetrates the skin and directly heats the fat layer beneath. As the fat melts, it renders out, creating the crispy texture we associate with perfect grilled chicken. Consequently, understanding Crispy Grilled Chicken Secrets means learning to harness radiant heat without overcooking the interior.
The Cornstarch Hack
One of the lesser-known Crispy Grilled Chicken Secrets is the use of cornstarch. Mixing 1 tablespoon of cornstarch with 1 tablespoon of kosher salt and dusting it over the dry-brined chicken skin absorbs additional surface moisture and creates an ultra-thin coating that crisps beautifully. Cornstarch is hydrophilic (water-attracting) and also gelatinizes under heat, creating a glassy, crispy shell.
What to Buy and Where to Find It: USA Grilling Essentials 🛒
Let me be specific about sourcing because the quality of your chicken and your equipment directly impacts the success of Crispy Grilled Chicken Secrets.
Chicken Selection
Use air-chilled chicken, not water-chilled. Water-chilled chickens are dunked in chlorinated water during processing, which causes them to absorb water. This excess moisture makes it nearly impossible to achieve crispy skin.
Where to buy:
- Smart Chicken (available at Whole Foods, Kroger, and select Targets)
- Heritage Farms (available at Sprouts and Whole Foods)
- Mary’s Free-Range Air-Chilled Chicken (available at Whole Foods and specialty butchers)
Size: For even cooking, use a 3.5 to 4.5 lb (1.6 to 2 kg) whole chicken. Larger birds take too long on the grill and risk burning the skin before the interior cooks through.
Charcoal and Wood
Kingsford Charcoal (available at Walmart, Home Depot, Lowe’s) is the standard. It burns hot and long. For enhanced flavour, add wood chunks (not chips, which burn too fast):
- Applewood: Mild, sweet, fruity smoke
- Hickory: Strong, bacon-like smoke
- Cherry: Medium smoke with slight sweetness
Best wood chips for flavor also include pecan and oak. Avoid mesquite for chicken—it is too intense.
Traeger Wood Pellets work well if you are using a pellet grill.
Grill Equipment
- Weber Original Kettle (22-inch): The gold standard for charcoal grilling, available at Home Depot, Lowe’s, Amazon
- Big Green Egg: Ceramic kamado-style grill, excellent heat retention, available at specialty retailers
- Gas alternative: Weber Spirit II or Genesis series
Tools
- Thermapen ONE or ThermoPro TP19: Instant-read thermometers for checking grilled chicken internal temperature (available at Amazon, Sur La Table)
- Chimney Starter: For lighting charcoal without lighter fluid (Weber brand, available everywhere)
- Grill Brush: For cleaning grates (stainless steel bristles)
- Long-handled tongs: 16-inch tongs for safe handling
Ingredients for Crispy Grilled Chicken Secrets 📝
This recipe is for 1 whole chicken (3.5-4.5 lbs), serves 4-6.
| Ingredient | US Customary | Metric |
|---|---|---|
| Whole chicken (air-chilled) | 1 chicken (3.5–4.5 lbs) | 1 chicken (1.6–2 kg) |
| Kosher salt | 2 tablespoons | 36g |
| Black pepper, freshly ground | 1 tablespoon | 9g |
| Garlic powder | 1 tablespoon | 9g |
| Smoked paprika | 1 tablespoon | 9g |
| Cornstarch (secret weapon) | 1 tablespoon | 9g |
| Olive oil or melted butter | 2 tablespoons | 30ml |
| Fresh herbs (rosemary, thyme) | 2 sprigs each | 2 sprigs each |
| Lemon, halved | 1 lemon | 1 lemon |
Common Mistakes That Ruin Crispy Grilled Chicken Secrets ❌
| The Mistake | What Actually Happens | The Fix |
|---|---|---|
| Grilling cold meat straight from fridge | Skin cooks faster than interior; meat stays cold and undercooked | Bring chicken to room temp 30 min before grilling |
| Using sugary sauces too early (burning) | Sugar caramelizes and burns before chicken is cooked through | Apply sauces only in final 5-10 minutes of cooking |
| Crowding the grill grates | Air cannot circulate; chicken steams instead of roasts | Leave space around chicken; use two-zone setup |
| Not cleaning the grates | Old residue causes sticking and imparts bitter flavors | Scrub grates hot before adding chicken |
| Skipping the dry brine | Skin retains too much moisture, stays flabby and pale | Always dry brine for minimum 4 hours, ideally 24 hours |
| Grilling over direct heat the entire time | Skin burns before interior reaches safe temp | Use two-zone method: indirect heat to cook, direct heat to crisp |
| Opening the lid constantly | Heat escapes, cooking time extends, skin doesn’t crisp | Close lid and trust the process; check temps only |
| Not resting after grilling | Juices run out when carved; meat becomes dry | Rest 10-15 minutes tented with foil |
How to Master Crispy Grilled Chicken Secrets: Step-by-Step 👨🍳
Step 1: The 24-Hour Air-Dry (The Foundation)
This is the single most important step in Crispy Grilled Chicken Secrets. Remove the chicken from packaging. Remove giblets from the cavity. Rinse briefly under cold water and pat completely dry with paper towels—inside and out.
In a small bowl, mix together 2 tablespoons kosher salt, 1 tablespoon black pepper, 1 tablespoon garlic powder, 1 tablespoon smoked paprika, and 1 tablespoon cornstarch. This is your dry brine and dehydration mixture.
Rub this mixture all over the chicken—under the skin (gently loosen the skin over the breast and thighs), inside the cavity, and all over the exterior. The cornstarch is one of the key Crispy Grilled Chicken Secrets—it pulls moisture out of the skin and creates a crispy coating.
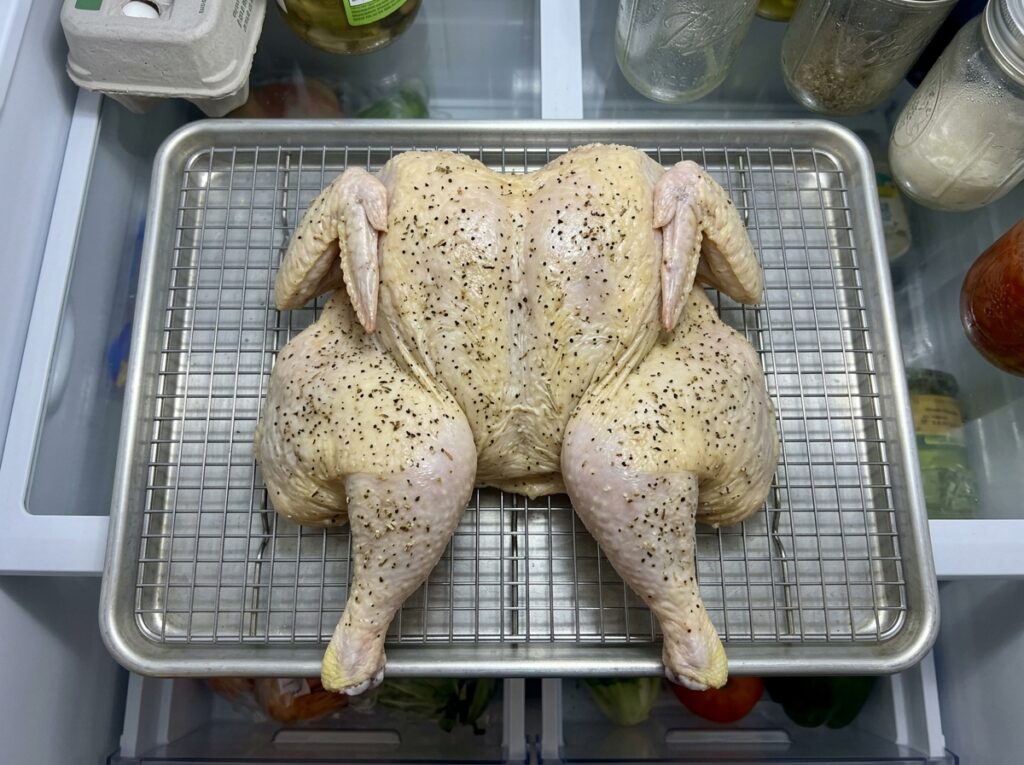
Place the chicken on a wire rack set over a rimmed baking sheet. Refrigerate uncovered for 12 to 24 hours. The circulating cold air will dehydrate the skin, forming the pellicle. The longer you can leave it (up to 24 hours), the crispier the skin will be.
Additionally, stuffing the cavity with lemon halves and fresh herbs (rosemary, thyme) adds aromatics that perfume the meat from the inside.
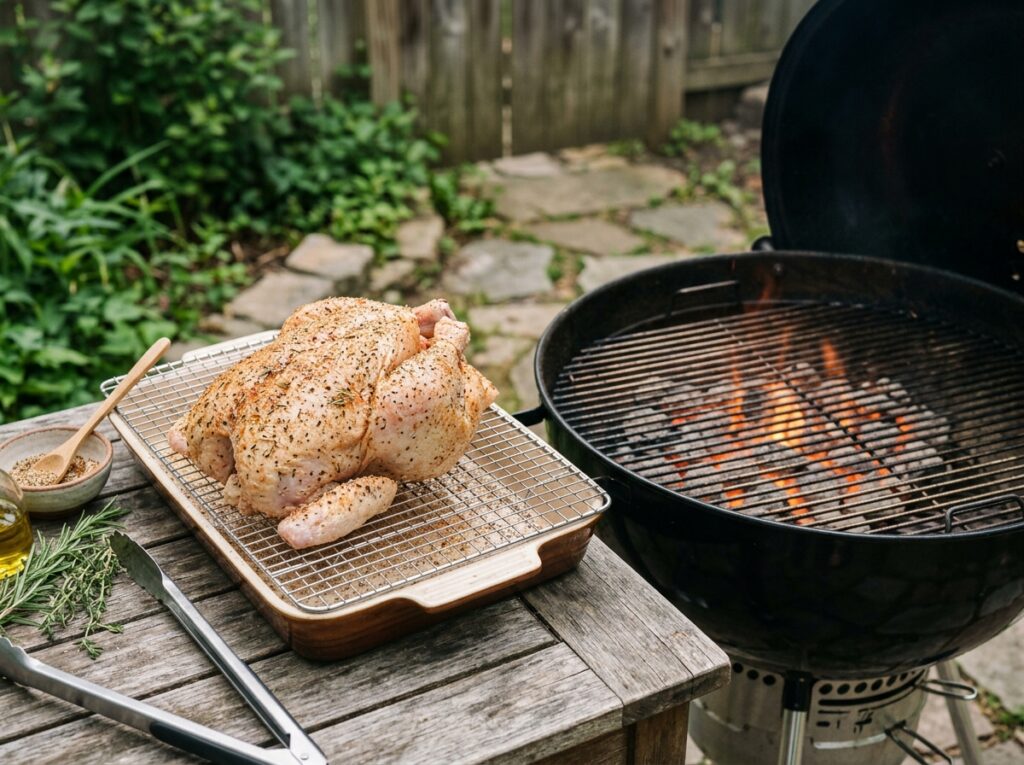
Step 2: The Two-Zone Setup (The Secret to Even Cooking)
The two-zone method is one of the most critical Crispy Grilled Chicken Secrets. It allows you to cook the chicken gently over indirect heat, then finish with a high-heat sear over direct flames.
For charcoal grills:
- Fill a chimney starter with Kingsford Charcoal and light it. Wait until the coals are covered with white ash (about 15-20 minutes).
- Pour all the hot coals onto one side of the grill, leaving the other side empty. This creates a hot zone (direct heat) and a cool zone (indirect heat).
- Add 2-3 chunks of applewood or cherry wood on top of the coals for smoke flavor.
- Place the grill grate on and let it preheat for 5 minutes. Scrub clean with a grill brush.
For gas grills:
- Light burners on one side only (usually the left or right). Leave the other side off. This creates the same two-zone setup.
Step 3: The Skin-Down Sear (Rendering the Fat)
Remove the chicken from the refrigerator 30 minutes before grilling to bring it closer to room temperature. Brush the skin lightly with olive oil or melted butter—this aids browning.
Place the chicken breast-side down on the indirect heat side (the side without coals or with burners off). Close the lid. Maintain a grill temperature of 350°F to 375°F (177°C to 190°C).
Cook for 45 to 60 minutes, depending on the size of the chicken. Do not open the lid frequently—every time you open it, you lose heat. Use the grill’s thermometer or insert a probe thermometer through the vent.
After 45 minutes, check the internal temperature by inserting an instant-read thermometer into the thickest part of the thigh (without touching bone). You are looking for 155°F to 160°F (68°C to 71°C) at this stage.
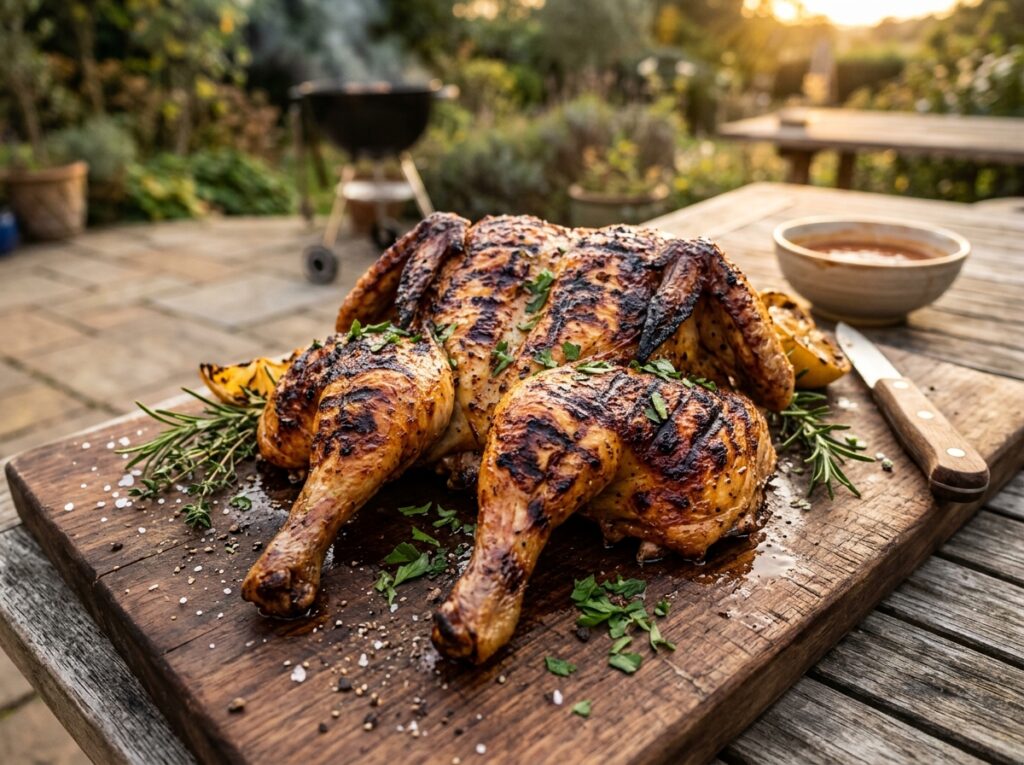
Step 4: The Direct Heat Finish (Creating the Char)
Once the chicken reaches 155°F to 160°F internally, it is time to crisp the skin. This is where the final Crispy Grilled Chicken Secrets come into play.
Carefully flip the chicken breast-side up. Move it to the direct heat side of the grill (over the hot coals or lit burners). Close the lid for 5 to 8 minutes.
You will hear the fat sizzle and see flare-ups as the drippings hit the coals. This is good—the flames create the char and smoky flavor. However, watch carefully to prevent burning. If flames get too aggressive, move the chicken slightly to the side.
The skin should darken, blister slightly, and become deeply golden brown with visible cross-hatch grill marks. The internal temperature will rise to 165°F (74°C) during this final sear.
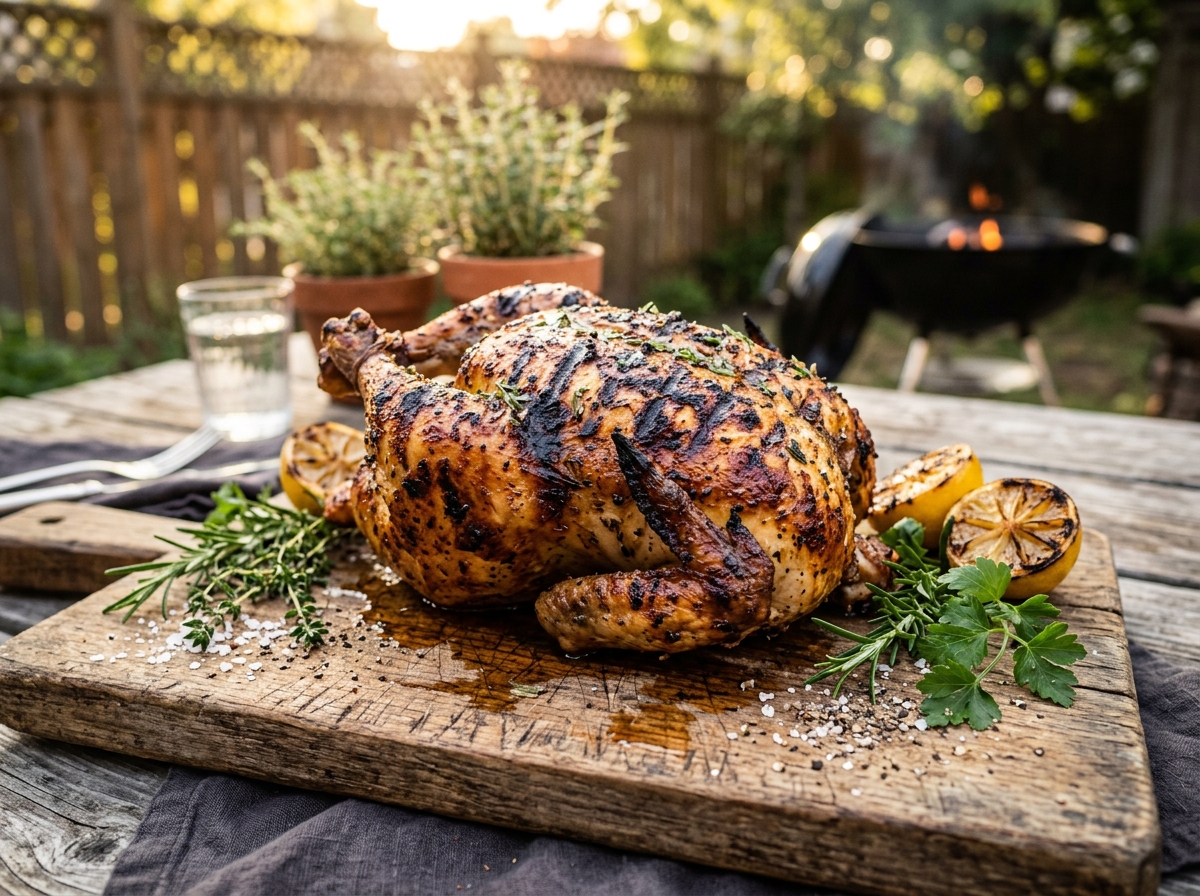
Step 5: The Carryover Rest
Remove the chicken from the grill when the thigh reaches 165°F (74°C). Transfer to a cutting board and tent loosely with aluminum foil. Let rest for 10 to 15 minutes.
During this rest, carryover cooking will bring the temperature up another 5°F, and the juices will redistribute throughout the meat. Consequently, when you carve, the chicken will be moist, not dry.
The skin will remain crispy because you properly dehydrated it during the air-dry phase. If you skip that step, the skin will soften during the rest.
Crispy Grilled Chicken Secrets (The Science of the Perfect Char)
Ingredients
Equipment
Method
- Remove chicken from packaging. Remove giblets from cavity. Rinse briefly under cold water and pat COMPLETELY dry with paper towels—inside and out. In small bowl, mix 2 tablespoons kosher salt, 1 tablespoon black pepper, 1 tablespoon garlic powder, 1 tablespoon smoked paprika, and 1 tablespoon cornstarch. This is your dry brine and dehydration mixture. Cornstarch is one of key Crispy Grilled Chicken Secrets—it pulls moisture from skin and creates crispy coating. Rub mixture all over chicken—under skin (gently loosen skin over breast and thighs), inside cavity, and all over exterior. Stuff cavity with lemon halves and fresh herbs (rosemary, thyme). Place chicken on wire rack set over rimmed baking sheet. Refrigerate UNCOVERED for 12-24 hours. Circulating cold air will dehydrate skin, forming pellicle. Longer you leave it (up to 24 hours), crispier skin will be.
- Two-zone method is one of most critical Crispy Grilled Chicken Secrets. It allows gentle cooking over indirect heat, then high-heat sear over direct flames. FOR CHARCOAL: Fill chimney starter with Kingsford Charcoal and light. Wait until coals covered with white ash (15-20 minutes). Pour all hot coals onto ONE SIDE of grill, leaving other side empty. This creates hot zone (direct heat) and cool zone (indirect heat). Add 2-3 chunks applewood or cherry wood on top of coals for smoke. Place grill grate on and preheat 5 minutes. Scrub clean with grill brush. FOR GAS: Light burners on one side only. Leave other side off. This creates same two-zone setup.
- Remove chicken from refrigerator 30 minutes before grilling to bring closer to room temperature. This ensures even cooking—cold chicken cooks unevenly with outside overcooking before inside reaches safe temp. Brush skin lightly with olive oil or melted butter—this aids browning and Maillard reaction.
- Place chicken BREAST-SIDE DOWN on INDIRECT HEAT side (side without coals or with burners off). Close lid. Maintain grill temperature 350°F-375°F (177°C-190°C). Use grill’s built-in thermometer or insert probe thermometer through vent. Cook 45-60 minutes depending on size. Do NOT open lid frequently—every time you open, you lose heat. After 45 minutes, check internal temperature by inserting instant-read thermometer into thickest part of THIGH (without touching bone). Look for 155°F-160°F (68°C-71°C) at this stage.
- Once chicken reaches 155°F-160°F internally, time to crisp skin. This is where final Crispy Grilled Chicken Secrets come into play. Carefully flip chicken BREAST-SIDE UP. Move to DIRECT HEAT side (over hot coals or lit burners). Close lid for 5-8 minutes. You’ll hear fat sizzle and see flare-ups as drippings hit coals—this is good. Flames create char and smoky flavor. Watch carefully to prevent burning. If flames too aggressive, move chicken slightly to side. Skin should darken, blister slightly, become deeply golden brown with visible cross-hatch grill marks. Internal temperature will rise to 165°F (74°C) during final sear.
- Remove chicken from grill when thigh reaches 165°F (74°C). Transfer to cutting board and tent loosely with aluminum foil. Let rest 10-15 minutes. During rest, carryover cooking brings temperature up another 5°F, and juices redistribute throughout meat. When you carve, chicken will be moist, not dry. Skin will remain crispy because you properly dehydrated during air-dry phase. If you skip that step, skin softens during rest. Carve and serve immediately while skin is still crackling.
Notes
Chef Mansoor’s Insight 💭
Fire is the oldest cooking technology we have. Long before ovens, before pans, before even pottery, there was meat and flame. When you grill chicken, you are tapping into something primal—a connection that transcends recipes and techniques. But primal does not mean primitive. The perfect char is the marriage of ancient instinct and modern science. You control the moisture. You manipulate the heat. You understand the pellicle, the Maillard reaction, the radiant transfer. Crispy Grilled Chicken Secrets are not secrets at all. They are the language of fire, spoken with precision. And when you master that language, every meal becomes a tribute to the first cook who ever laid meat over flame.
— Chef Mansoor, The Flavour Bazar
Nutrition Information (Per Serving) 📊
| Nutrient | Amount |
|—|—|—|
| Serving Size | 4 oz chicken (skin-on) |
| Servings | 4-6 |
| Calories | 320 kcal |
| Protein | 32g |
| Total Fat | 20g |
| Saturated Fat | 6g |
| Carbohydrates | 2g |
| Dietary Fiber | 0g |
| Sugars | 0g |
| Sodium | 640mg |
| Cholesterol | 110mg |
Note: Nutrition values are estimates based on air-chilled whole chicken with skin, dry brine, and minimal oil.
Food Safety & Temperature Guide 🌡️
| Stage | Temperature |
|---|---|
| USDA Safe Minimum (Chicken) | 165°F / 74°C |
| Chef Mansoor Pull Temp (Thigh) | 160°F / 71°C |
| Final Temp After Resting | 165°F / 74°C |
| Grill Temperature (Indirect Zone) | 350°F–375°F / 177°C–190°C |
| Grill Temperature (Direct Zone) | 500°F–700°F+ / 260°C–371°C+ |
| Danger Zone (Do Not Hold Food) | 40°F–140°F / 4°C–60°C |
Important: Always measure internal temperature in the thickest part of the thigh without touching bone. Breast meat cooks faster and will be done when thigh reaches 165°F.
Storage & Reheating Guide 🥡
| Storage Method | Duration | Best Reheat Method |
|---|---|---|
| Refrigerator (whole or carved) | 3–4 days | Oven at 350°F for 15-20 min to restore crispy skin |
| Freezer (carved, wrapped tightly) | 3 months | Thaw in fridge, reheat in oven at 375°F |
| Room temperature (cooked) | Do not store | Consume within 2 hours or refrigerate |
How to Save That Crispy Skin:
Grilled chicken skin stays crispy if stored properly. Place leftover chicken on a wire rack over a baking sheet (not in a sealed container where steam will soften the skin). Cover loosely with foil and refrigerate.
To reheat: Preheat oven to 350°F (177°C). Place chicken on a wire rack over a baking sheet and heat for 15-20 minutes. The circulating air will re-crisp the skin. Do not microwave—microwaves add moisture and turn crispy skin rubbery.
Frequently Asked Questions ❓
What is the difference between dry brine vs wet brine for grilling?
Dry brine (salt and spices rubbed on the surface) draws moisture out of the skin, concentrating flavor and creating a drier surface for crisping. It is superior for Crispy Grilled Chicken Secrets because it promotes pellicle formation.
Wet brine (chicken submerged in saltwater) adds moisture to the meat, making it juicier but also making the skin wetter. Wet-brined chicken has flabby, pale skin that is harder to crisp. For grilling, always choose dry brine.
Can I use a gas grill instead of charcoal?
Yes. Gas grills work well for Crispy Grilled Chicken Secrets if you use the two-zone method. However, charcoal provides better flavor due to smoke and higher radiant heat from glowing coals. If using gas, consider adding a smoker box with wood chips for flavor.
How do I know when the chicken is done without a thermometer?
You should not rely on visual cues alone. Undercooked chicken is a food safety risk. However, if you must: pierce the thigh with a knife—if juices run clear (not pink), it is likely done. The leg should also wiggle easily in the socket. But always use a thermometer for safety.
What are the best wood chips for flavor?
For chicken, applewood and cherry provide mild, sweet smoke. Pecan adds a nutty note. Hickory is stronger and more bacon-like. Avoid mesquite—it is too intense for poultry. Use chunks, not chips, as they burn slower and produce more consistent smoke.
Why does my chicken skin burn before the meat cooks through?
This happens when you cook over direct heat the entire time. The solution is the two-zone method: cook over indirect heat until the internal temperature is nearly done, then finish over direct heat for the final crisp. This is one of the core Crispy Grilled Chicken Secrets.
Can I spatchcock the chicken for faster grilling?
Yes. Spatchcocking (removing the backbone and flattening) reduces cooking time by 25-30% and promotes more even cooking. All the same Crispy Grilled Chicken Secrets apply—dry brine, air-dry, cornstarch, two-zone method.
You Might Also Love These Recipes 🍽️
If you enjoyed mastering Crispy Grilled Chicken Secrets, here are a few more techniques and recipes from The Flavour Bazar that will complete your outdoor cooking repertoire:
15-Minute Lemon Garlic Shrimp (The Science of the Sizzle)
Perfect for a surf-and-turf grill night alongside your crispy chicken.
Air Fryer Whole Chicken (The Perfect Sunday Roast)
Indoor alternative using the same pellicle and dry-brine science.
Air Fryer Smashed Potatoes (Crispy Edges, Fluffy Centers)
Ideal grilled chicken side dish with maximum crunch.
Secret Ingredient Smash Burgers (The Science of the Crust)
Another lesson in the Maillard reaction and high-heat searing.
Crispy Air Fryer Brussels Sprouts with Garlic
Caramelization and Maillard browning applied to vegetables.
Air Fryer Salmon: The Science of the Perfect 15-Minute Recipe
The perfect salmon.
For More Healthy Recipes Visit: flavourbazar.com