How to Brine a Turkey: The Osmosis Method
By Chef Mansoor | Flavour Bazar
The Cellular Truth About Why Turkeys Dry Out 🦃
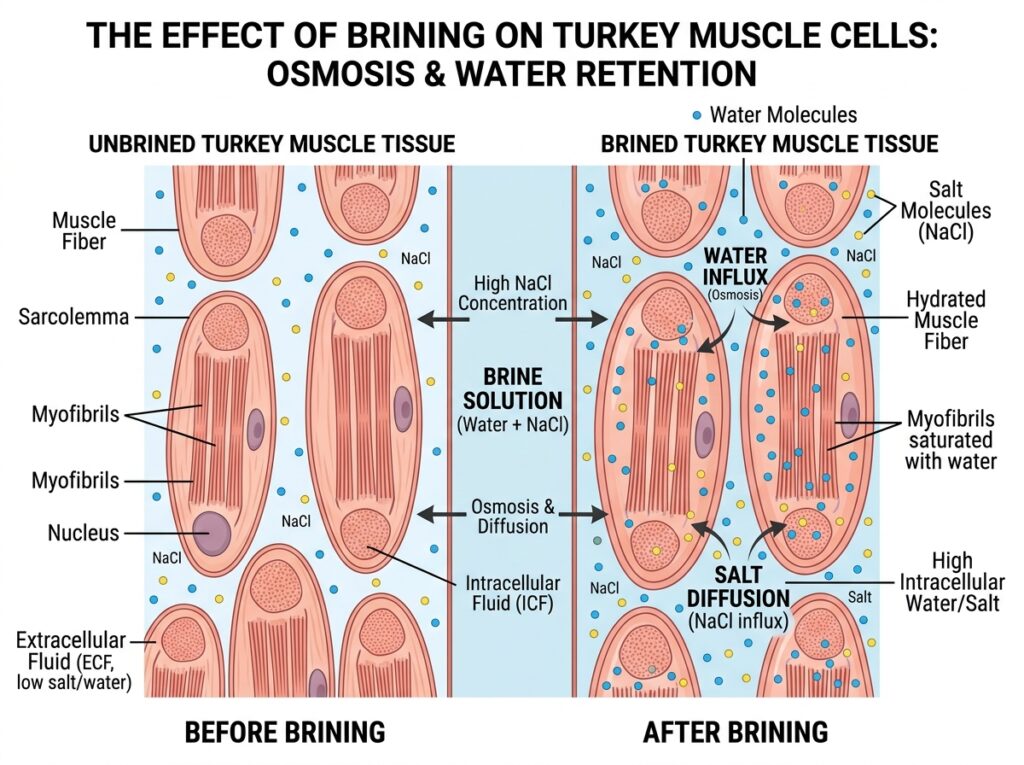
Inside every turkey breast, millions of muscle cells sit packed with water, proteins, and flavor compounds. These cells are surrounded by semi-permeable membranes that regulate what goes in and what comes out. When you roast a turkey at 325°F to 350°F (163°C to 177°C), those cells lose 20 to 25 percent of their weight in water. The proteins denature. The membranes rupture. The moisture evaporates.
This is not your fault. This is physics.
I have conducted controlled experiments on bird hydration for over a decade, measuring weight-gain percentages to prove that osmosis is the only way to safeguard your Thanksgiving investment. Consequently, if you want juicy turkey breast secret knowledge, you need to understand how to brine a turkey at the molecular level.
The process is called osmosis. When you submerge a turkey in a salt solution, the salt concentration outside the cells is higher than inside. Water naturally moves from areas of low solute concentration to high solute concentration to achieve equilibrium. Therefore, the turkey absorbs water. Additionally, the salt denatures the muscle proteins (myosin and actin), causing them to unwind and form a gel matrix that traps water even after cooking.
Moreover, how to brine a turkey is not just about soaking it in salty water. It is about understanding the exact salt concentration for poultry, the timing, the temperature control, and the science of protein restructuring. When done correctly, brining increases the moisture content of turkey meat by 8 to 12 percent and seasons it from the inside out.
Specifically, this is the technique that separates dry, flavorless turkey from the kind that makes your guests ask for the recipe. Let me show you exactly how to brine a turkey using science, precision, and a decade of Thanksgiving turkey tips that actually work.
The Science of How to Brine a Turkey: Osmosis Explained 🧪
To truly understand how to brine a turkey, you must first understand osmotic pressure. Osmotic pressure is the force required to prevent water from moving across a semi-permeable membrane due to differences in solute concentration.
The formula for osmotic pressure is:
π=iMRT
Where:
- π (pi) = osmotic pressure
- i = van ‘t Hoff factor (number of particles the solute dissociates into; for NaCl, i = 2)
- M = molar concentration of the solute
- R = ideal gas constant
- T = absolute temperature in Kelvin
In simple terms: the more salt you dissolve in water, the greater the osmotic pressure, and the more water will be pulled into the turkey cells to balance the concentration gradient.
However, there is a limit. If the salt concentration is too high, water will actually be pulled out of the turkey (reverse osmosis), leaving you with salty, dehydrated meat. If the concentration is too low, osmosis occurs too slowly, and you do not get adequate water absorption or protein denaturation.
The ideal salt concentration for poultry is 5 to 6 percent by weight. This translates to approximately ¾ cup (180g) of kosher salt per gallon (3.8 liters) of water. This concentration creates enough osmotic pressure to drive water into the cells without over-salting or dehydrating the meat.
Additionally, the salt denatures the proteins. Myosin and actin—the two main muscle proteins—normally exist in tight, coiled structures. When exposed to salt, these proteins unwind and form a loose gel network. This network traps water molecules, preventing them from escaping during cooking. Consequently, even when the turkey reaches 165°F (74°C) internal temperature, the restructured proteins hold onto moisture far better than un-brined meat.
Therefore, how to brine a turkey is fundamentally about manipulating osmotic pressure and protein chemistry to create a reservoir of trapped water that survives the roasting process.
Wet Brine vs Dry Brine: Which Method is Best for How to Brine a Turkey? 💧
One of the most common questions I receive about how to brine a turkey is whether to use a wet brine or a dry brine. Both methods work, but they operate through different mechanisms and produce different results.
Wet Brine (Traditional Osmosis Method)
A wet brine is a saltwater solution (often with added sugar, herbs, and spices) in which the turkey is fully submerged for 12 to 24 hours. This is the classic method and the one I recommend for how to brine a turkey if your goal is maximum moisture retention.
Advantages:
- Higher moisture absorption: The turkey can gain 8–12% of its weight in water
- Even seasoning: Salt penetrates deeply and uniformly
- Aromatic infusion: Herbs, citrus, and spices in the brine add subtle flavor
- Proven science: Osmosis is a well-documented, reliable process
Disadvantages:
- Requires space: You need a large container and refrigerator space
- Messier: Handling a turkey in liquid is cumbersome
- Crispness challenge: Excess surface moisture can prevent skin from crisping (solved by air-drying)
Dry Brine (Salt Rub Method)
A dry brine is simply coarse salt (sometimes mixed with herbs and sugar) rubbed directly onto the turkey skin and inside the cavity. The turkey is then refrigerated uncovered for 24 to 48 hours. The salt draws moisture out of the turkey, dissolves in that moisture, and then is reabsorbed along with the salt—a process called equilibrium curing.
Advantages:
- Crisper skin: No excess liquid means better browning and crunch
- Less mess: No liquid to manage, easier handling
- Space-efficient: Turkey sits on a tray in the fridge
- Concentrated flavor: Salt stays on the surface longer, intensifying seasoning
Disadvantages:
- Less moisture gain: Typically only 3–5% weight increase
- Longer time required: Needs 24–48 hours vs. 12–24 for wet brine
- Uneven penetration: Salt may not reach the deepest muscle tissue as effectively
Chef Mansoor’s Verdict
If you want the juiciest turkey breast secret, use a wet brine. The osmotic pressure drives more water into the meat, and the protein denaturation is more thorough. However, you must follow the air-dry step after brining to ensure crispy skin.
If you prioritize crispy skin and have limited refrigerator space, use a dry brine. You will still get well-seasoned, reasonably moist meat, but not the same level of hydration as wet brining.
Consequently, for this guide on how to brine a turkey, I will focus on the wet brine method because it delivers the most dramatic improvement in moisture and flavor.
What to Buy and Where to Find It: USA Turkey Brining Guide 🛒
Let me be specific about sourcing because the quality of your turkey and your salt determines the success of how to brine a turkey.
Choosing the Right Turkey
Butterball vs. Heritage Birds:
Butterball and most mass-market turkeys sold at Walmart, Kroger, and Target are often pre-brined or “enhanced.” This means they have been injected with a salt solution (sometimes labeled as “basted,” “self-basting,” or “enhanced with up to 8% solution”). If you brine an already-brined turkey, it will be unbearably salty.
How to check: Read the label carefully. If it says “contains up to X% solution” or “enhanced,” do NOT brine it. These birds are already salted.
What to buy instead:
- Natural, un-enhanced turkeys: Look for labels that say “100% natural,” “no added solution,” or “un-brined”
- Heritage breed turkeys: Available at Whole Foods, Trader Joe’s, and specialty butchers. Brands like Mary’s Free-Range or Diestel Turkey Ranch are excellent choices
- Frozen turkeys: Make sure they are plain, with no added solutions
Size recommendation: For wet brining, choose a turkey 12 to 16 pounds (5.4 to 7.3 kg). Larger birds are harder to submerge and brine unevenly.
Salt Selection
The type of salt you use is critical for how to brine a turkey.
DO NOT USE TABLE SALT. Table salt is too fine, dissolves too quickly, and often contains anti-caking agents that cloud the brine. Additionally, table salt is denser than kosher salt, so measurements are not interchangeable.
Use kosher salt:
- Morton Kosher Salt (available at Walmart, Kroger, Target): Denser, larger flakes
- Diamond Crystal Kosher Salt (available at Whole Foods, Kroger): Lighter, fluffier flakes
Important: Morton and Diamond Crystal have different densities. 1 cup of Morton Kosher Salt weighs more than 1 cup of Diamond Crystal. Therefore, always measure by weight (grams) if possible.
For a gallon of water, use:
- ¾ cup Morton Kosher Salt (180g)
- 1 cup Diamond Crystal Kosher Salt (180g)
Brining Container
You need a food-grade container large enough to fully submerge the turkey. Options:
- 5-gallon food-grade bucket with lid (The Home Depot or Lowe’s, about $8–12)
- Large stockpot (20–24 quarts)
- Brining bag (Ziploc makes XL turkey brining bags, available at Target and Kroger)
- Cooler (if you plan to brine in ice, not in the fridge)
Aromatics and Flavor Boosters
- Fresh thyme, rosemary, sage (Whole Foods, Trader Joe’s)
- Black peppercorns (whole, not ground)
- Bay leaves
- Garlic cloves, smashed
- Citrus (oranges, lemons)
- Brown sugar (optional, adds sweetness and promotes browning)
Ingredients for How to Brine a Turkey 📝
This recipe makes enough brine for a 12 to 16 lb (5.4 to 7.3 kg) turkey.
| Ingredient | US Customary | Metric |
|---|---|---|
| Water (cold) | 2 gallons | 7.5 liters |
| Water (for boiling aromatics) | 2 cups | 480ml |
| Kosher salt (Morton) | 1½ cups | 360g |
| Kosher salt (Diamond Crystal) | 2 cups | 360g |
| Brown sugar (optional) | ½ cup | 100g |
| Black peppercorns, whole | 2 tablespoons | 20g |
| Fresh thyme sprigs | 6–8 sprigs | 6–8 sprigs |
| Fresh rosemary sprigs | 4 sprigs | 4 sprigs |
| Fresh sage leaves | 10 leaves | 10 leaves |
| Bay leaves | 4 leaves | 4 leaves |
| Garlic cloves, smashed | 8 cloves | 40g |
| Orange, quartered | 1 large | 1 large |
| Lemon, quartered | 1 large | 1 large |
| Ice (to chill brine) | 4–6 lbs | 2–3 kg |
| Turkey (un-enhanced, natural) | 12–16 lbs | 5.4–7.3 kg |
Common Mistakes That Ruin How to Brine a Turkey ❌
| The Mistake | What Actually Happens | The Fix |
|---|---|---|
| Using a pre-salted (enhanced) bird | Double-salting makes turkey unbearably salty and mushy | Always check label for “enhanced,” “basted,” or “contains solution” |
| Brining for too long (over 24 hours) | Proteins break down excessively, meat becomes mushy and spongy | Brine for 12–18 hours max; 24 hours only for very large birds |
| Not rinsing the bird after brining | Surface is too salty, skin tastes like ocean water | Rinse thoroughly under cold water, pat completely dry |
| Using hot water to start the brine | Bacteria multiply rapidly, turkey enters danger zone | Always use cold water; chill brine below 40°F before adding turkey |
| Not fully submerging the turkey | Exposed parts don’t brine, resulting in uneven seasoning | Use a plate or heavy object to keep turkey submerged |
| Skipping the air-dry phase | Skin stays wet, doesn’t crisp during roasting | After brining, refrigerate turkey uncovered 8–12 hours to dry skin |
| Using table salt instead of kosher salt | Brine is too salty, measurements are wrong, flavor is off | Use only kosher salt; measure by weight for accuracy |
| Brining above 40°F (4°C) | Bacteria grow in danger zone, food safety risk | Keep brine refrigerated or in cooler with ice; check temp regularly |
How to Brine a Turkey: Step-by-Step Method 👨🍳
Step 1: Thaw the Turkey Completely
If you are starting with a frozen turkey, it must be completely thawed before you begin how to brine a turkey. The USDA recommends thawing in the refrigerator at a rate of 24 hours per 4–5 pounds (1.8–2.3 kg).
For a 16 lb turkey, plan for 4 days of thawing time in the fridge. The turkey is fully thawed when the cavity is free of ice and the breast feels soft when pressed.
Never thaw a turkey at room temperature. This allows the outer layers to enter the bacterial danger zone (40°F–140°F / 4°C–60°C) while the inside is still frozen.
Step 2: The Aromatics Boil (Building Flavour)
In a medium saucepan, combine 2 cups (480ml) of water with all the aromatics: thyme, rosemary, sage, bay leaves, garlic, orange quarters, lemon quarters, peppercorns, and brown sugar (if using).
Bring to a boil over high heat. Once boiling, reduce heat and simmer for 5 minutes. The goal is to extract essential oils from the herbs and citrus, creating a concentrated aromatic base.
Remove from heat and let cool to room temperature. This aromatic concentrate will be added to the main brine later.
Step 3: The Ice Bath Chill (Critical for Food Safety)
In your brining container (5-gallon bucket, stockpot, or cooler), combine 2 gallons (7.5 liters) of cold water with the kosher salt. Stir vigorously until the salt is completely dissolved. This will take 2–3 minutes of stirring.
Add the cooled aromatic concentrate to the saltwater. Stir to combine.
Now add 4 to 6 pounds (2 to 3 kg) of ice directly to the brine. Stir until most of the ice has melted. Check the temperature with a thermometer. The brine must be below 40°F (4°C) before you add the turkey.
This step is non-negotiable. A warm brine creates a breeding ground for bacteria. Therefore, always chill your brine thoroughly before proceeding with how to brine a turkey.
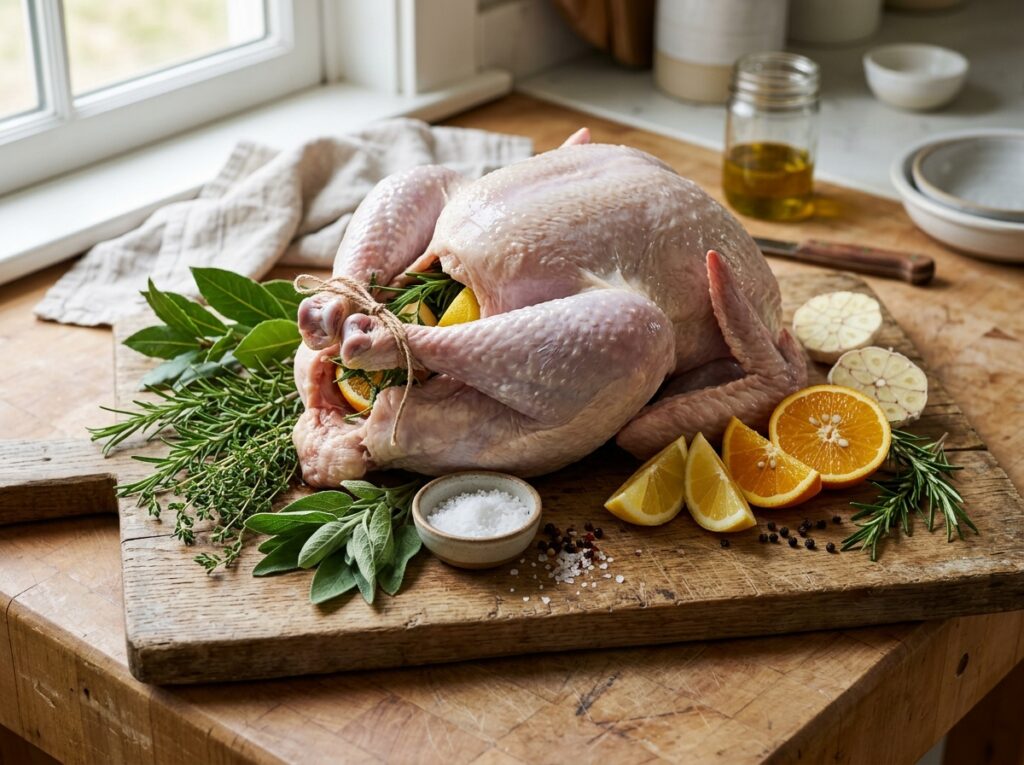
Step 4: Prepare the Turkey
Remove the turkey from its packaging. Reach inside the cavity and remove the giblet packet (usually contains neck, heart, liver, gizzard). Save these for making gravy if desired.
Rinse the turkey briefly under cold water to remove any residual packaging fluids. Pat dry with paper towels.
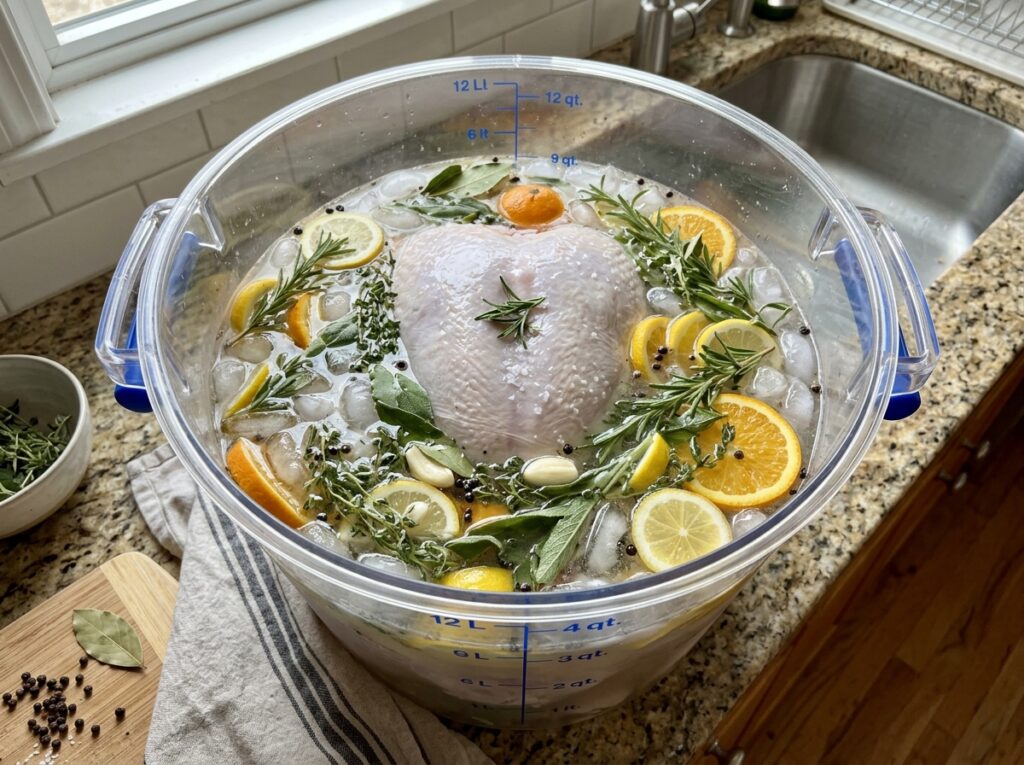
Step 5: The Full Submerge (Osmosis Begins)
Carefully lower the turkey into the chilled brine, breast-side down. The turkey should be completely submerged. If it floats or parts of it are exposed, place a heavy plate or a sealed bag of ice on top to weigh it down.
Cover the container with a lid or plastic wrap. If using a cooler, close the lid.
Where to brine:
- In the refrigerator: Best option for food safety. Make sure you have enough space.
- In a cooler with ice: If your fridge is full, use a clean cooler. Add ice packs or frozen water bottles around the turkey to keep the temperature below 40°F (4°C). Check and replenish ice every 4–6 hours.
- In a cold garage or basement (only if ambient temp is below 40°F): Monitor temperature closely with a thermometer.
Step 6: Brine Time (Osmosis at Work)
Brine the turkey for 12 to 18 hours. Do not exceed 24 hours, even for a very large bird. Over-brining breaks down proteins excessively, resulting in mushy texture.
During this time, osmotic pressure is driving water and salt into the muscle cells. The salt is denaturing the myosin and actin proteins, creating a gel matrix that will trap moisture during roasting.
Consequently, this is the most important passive step in how to brine a turkey. Trust the science. Let osmosis do its work.
Step 7: Rinse and Dry
After brining, remove the turkey from the brine. Discard the brine (it is not reusable).
Rinse the turkey thoroughly under cold running water, inside and out. This removes excess salt from the surface. If you skip this step, the skin will be unbearably salty.
Pat the turkey completely dry with paper towels, inside and out. Pay special attention to the skin.
Step 8: The Air-Dry Phase (For Crispy Skin)
This is the secret to crispy skin after brining. Place the turkey on a wire rack set over a rimmed baking sheet. Refrigerate uncovered for 8 to 12 hours (or overnight).
The circulating cold air will dry out the skin. Dry skin browns and crisps far better than wet skin. Additionally, the turkey will come closer to room temperature, which promotes even cooking.
Do not skip this step if you want golden, crackling skin. This is the difference between professional-quality roasted turkey and home-cooked mediocrity.
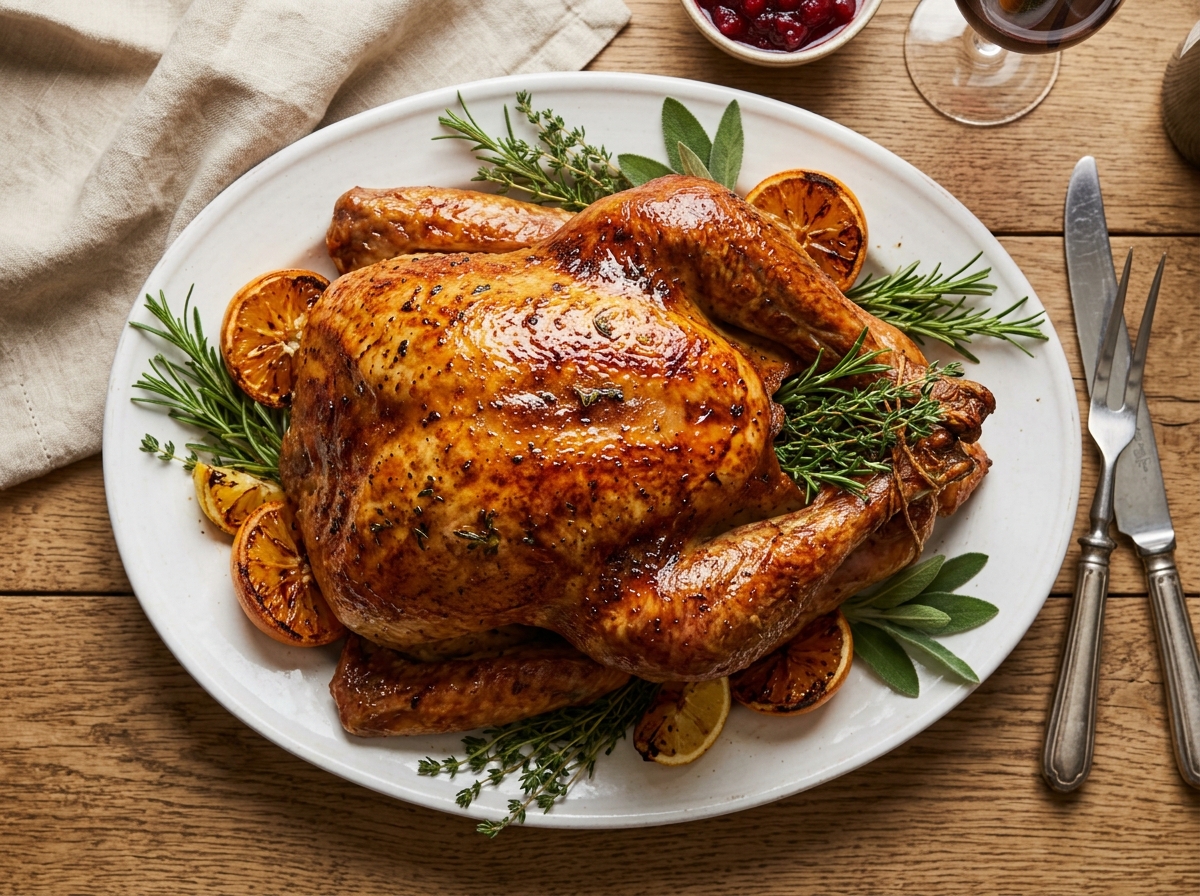
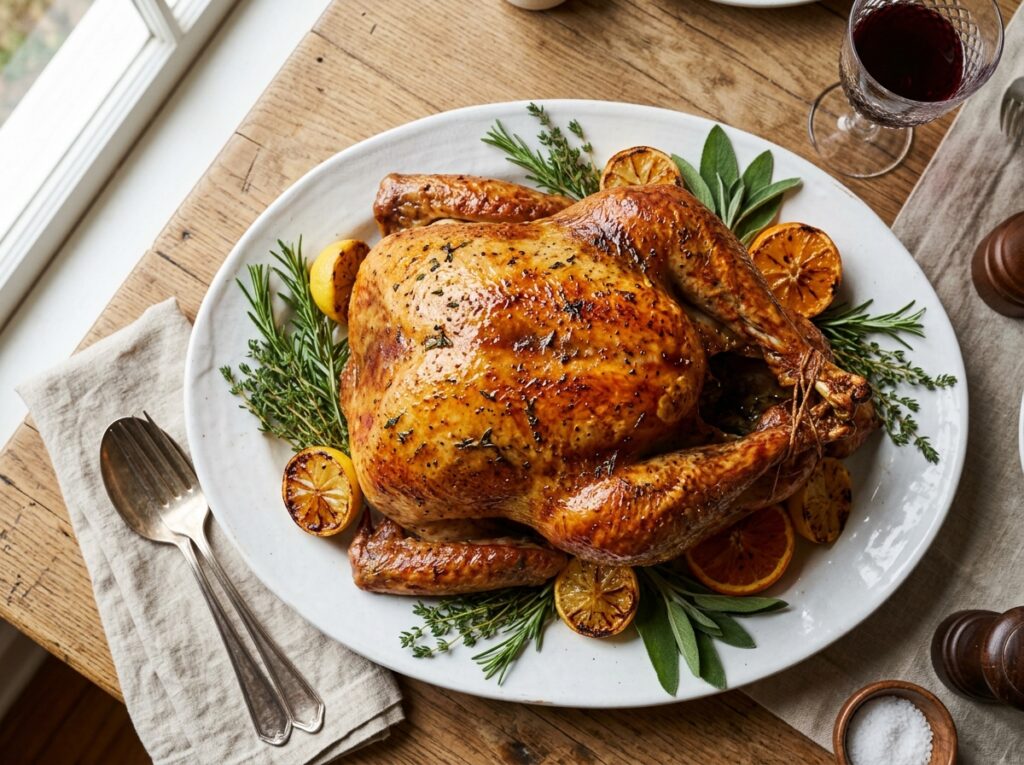
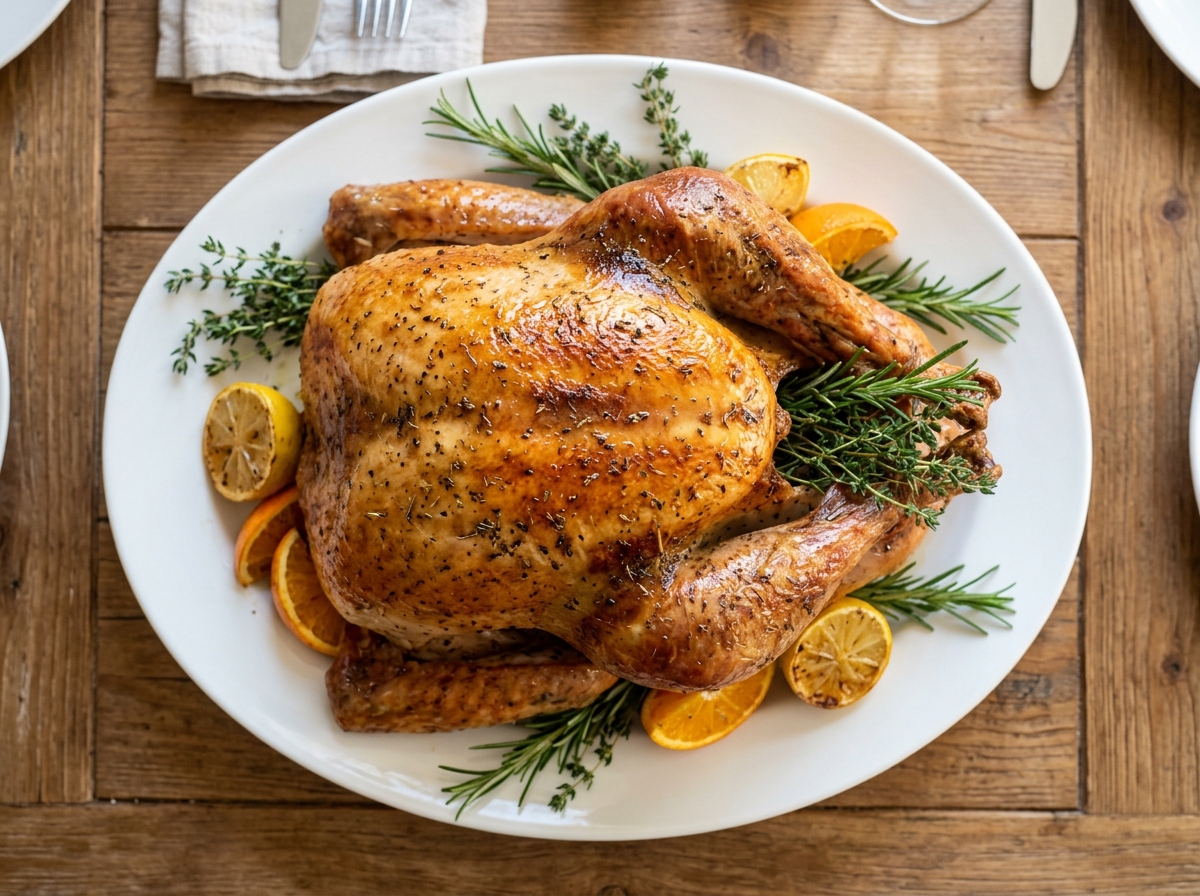
Step 9: Roast as Usual
Once the turkey is air-dried, you can roast it using your preferred method. Because the turkey is pre-salted from brining, do not add additional salt to the outside. You can brush with butter, add herbs, or season with pepper, but skip the salt.
Roast at 325°F to 350°F (163°C to 177°C) until the thickest part of the breast reaches 160°F (71°C). Remove from the oven and let rest for 20–30 minutes. Carryover cooking will bring the internal temperature to the USDA-safe 165°F (74°C).
Moreover, because you followed how to brine a turkey correctly, the breast meat will retain its moisture even at this temperature, delivering the juicy turkey breast secret that makes Thanksgiving memorable.
How to Brine a Turkey (The Osmosis Method)
Ingredients
Equipment
Method
- If starting with frozen turkey, thaw completely in refrigerator at rate of 24 hours per 4-5 pounds. For 16 lb turkey, plan 4 days thawing time. Turkey is fully thawed when cavity is free of ice and breast feels soft when pressed. NEVER thaw at room temperature—this allows bacteria to multiply. Turkey must be completely thawed before brining begins.
- In medium saucepan, combine 2 cups water with all aromatics: thyme, rosemary, sage, bay leaves, garlic, orange quarters, lemon quarters, peppercorns, and brown sugar (if using). Bring to boil over high heat. Once boiling, reduce heat and simmer 5 minutes to extract essential oils from herbs and citrus. Remove from heat and let cool to room temperature. This aromatic concentrate will be added to main brine.
- In brining container (5-gallon bucket, stockpot, or cooler), combine 2 gallons cold water with kosher salt. Stir vigorously until salt is completely dissolved (2-3 minutes of stirring). Add cooled aromatic concentrate to saltwater. Stir to combine. Add 4-6 pounds ice directly to brine. Stir until most ice has melted. Check temperature with thermometer—brine MUST be below 40°F (4°C) before adding turkey. This is non-negotiable for food safety. Warm brine creates breeding ground for bacteria.
- Remove turkey from packaging. Reach inside cavity and remove giblet packet (usually contains neck, heart, liver, gizzard). Save for gravy if desired. Rinse turkey briefly under cold water to remove any residual packaging fluids. Pat dry with paper towels. DO NOT BRINE if turkey is labeled ‘enhanced,’ ‘basted,’ ‘self-basting,’ or ‘contains solution’—these are already pre-salted.
- Carefully lower turkey into chilled brine, breast-side down. Turkey should be completely submerged. If it floats or parts are exposed, place heavy plate or sealed bag of ice on top to weigh it down. Cover container with lid or plastic wrap. Store in refrigerator OR in cooler with ice. If using cooler, add ice packs or frozen water bottles around turkey to keep temperature below 40°F (4°C). Check and replenish ice every 4-6 hours. Brine temperature must stay between 32°F-40°F at all times.
- Brine turkey for 12-18 hours. Do NOT exceed 24 hours—over-brining results in mushy, spongy meat. During this time, osmotic pressure drives water and salt into muscle cells. Salt denatures myosin and actin proteins, creating gel matrix that traps moisture during roasting. For 12-14 lb turkey: 12-15 hours. For 14-16 lb turkey: 15-18 hours. Only very large birds (20+ lbs) should brine full 24 hours. Trust the science—let osmosis work.
- After brining, remove turkey from brine. Discard brine—it is NOT reusable and contains bacteria. Rinse turkey thoroughly under cold running water, inside and out. This removes excess salt from surface. If you skip this step, skin will be unbearably salty. Pat turkey completely dry with paper towels, inside and out. Pay special attention to skin.
- This is secret to crispy skin after brining. Place turkey on wire rack set over rimmed baking sheet. Refrigerate UNCOVERED for 8-12 hours (or overnight). Circulating cold air will dry out skin. Dry skin browns and crisps far better than wet skin. Additionally, turkey will come closer to room temperature, which promotes even cooking. Do NOT skip this step if you want golden, crackling skin. This is difference between professional-quality roasted turkey and home-cooked mediocrity.
- Once turkey is air-dried, roast using your preferred method. Because turkey is pre-salted from brining, DO NOT add additional salt to outside. You can brush with butter, add herbs, or season with pepper, but skip the salt. Roast at 325°F-350°F (163°C-177°C) until thickest part of breast reaches 160°F (71°C). Remove from oven and let rest 20-30 minutes. Carryover cooking will bring internal temperature to USDA-safe 165°F (74°C). Because you brined correctly, breast meat will retain moisture even at this temperature.
Notes
Chef Mansoor’s Insight 💭
Thanksgiving is the Super Bowl of home cooking. It is the one meal where amateur cooks face professional-level expectations. Your relatives arrive with memories of their grandmother’s bird, your friends compare your table to Instagram perfection, and everyone has an opinion. But here is what I have learned after a decade of controlled experiments: science levels the playing field. You do not need generational wisdom or culinary school training. You need osmotic pressure, protein chemistry, and patience. When you understand how to brine a turkey, you transform randomness into reliability. You stop hoping and start knowing. And when that turkey comes out of the oven—golden, juicy, perfectly seasoned—you realize the secret was never skill. It was science.
— Chef Mansoor, Flavour Bazar
Salinity Percentage & Brine Concentration Guide 📊
| Brine Volume | Morton Kosher Salt | Diamond Crystal Kosher Salt | Salinity % |
|---|---|---|---|
| 1 gallon (3.8L) | ¾ cup (180g) | 1 cup (180g) | 5.5% |
| 2 gallons (7.5L) | 1½ cups (360g) | 2 cups (360g) | 5.5% |
| 3 gallons (11.4L) | 2¼ cups (540g) | 3 cups (540g) | 5.5% |
Note: This concentration is ideal for poultry. Higher concentrations (above 8%) will draw water out of the meat (reverse osmosis). Lower concentrations (below 4%) will not provide adequate seasoning or moisture retention.
Turkey Thawing Guide ❄️
| Turkey Weight | Refrigerator Thawing Time (40°F / 4°C) | Cold Water Thawing Time |
|---|---|---|
| 8–12 lbs (3.6–5.4 kg) | 2–3 days | 4–6 hours |
| 12–16 lbs (5.4–7.3 kg) | 3–4 days | 6–8 hours |
| 16–20 lbs (7.3–9 kg) | 4–5 days | 8–10 hours |
| 20–24 lbs (9–10.9 kg) | 5–6 days | 10–12 hours |
Cold Water Thawing Method: Submerge turkey (in original packaging) in cold water. Change water every 30 minutes to keep temperature below 40°F (4°C). Cook immediately after thawing.
NEVER thaw turkey at room temperature. This allows bacteria to multiply in the danger zone.
Food Safety & Temperature Guide 🌡️
| Stage | Temperature/Guideline |
|---|---|
| Brine Temperature (Before Adding Turkey) | Below 40°F / 4°C |
| Brining Storage Temperature | 32°F–40°F / 0°C–4°C |
| Turkey Internal Temp (Pull from Oven) | 160°F / 71°C (breast) |
| Turkey Final Temp (After Resting) | 165°F / 74°C (USDA safe minimum) |
| Danger Zone (Do Not Hold Food) | 40°F–140°F / 4°C–60°C |
| Maximum Time at Room Temp (Cooked) | 2 hours |
USDA Turkey Safety Resource: USDA Poultry Safety Guidelines
Critical Safety Rule: If your brine temperature rises above 40°F (4°C) for more than 2 hours, discard the turkey and start over. Food safety is not negotiable.
Frequently Asked Questions ❓
Can I brine a turkey for 48 hours?
No. Brining a turkey for more than 24 hours will result in mushy, spongy meat. The proteins break down excessively, and the texture becomes unpleasant. For most turkeys (12–16 lbs), 12 to 18 hours is ideal. Only very large birds (20+ lbs) should brine for the full 24 hours.
Do I need to brine if my turkey is already “enhanced”?
No. Pre-brined or “enhanced” turkeys (labeled “basted,” “self-basting,” or “contains up to X% solution”) have already been injected with a salt solution. If you brine them again, they will be unbearably salty. Check the label carefully before deciding how to brine a turkey.
Can I reuse the brine?
Absolutely not. The brine has been in contact with raw turkey and is contaminated with bacteria. Discard it after use. Never reuse brine for another turkey or for cooking.
How do I know if my turkey is fully submerged?
The entire turkey should be covered by brine. If parts are floating above the surface, place a heavy plate, a sealed bag of ice, or a clean weight on top to keep it submerged. Uneven brining results in unevenly seasoned meat.
Can I brine a turkey in a garbage bag?
I do not recommend it. Most garbage bags are not food-grade and may contain chemicals that leach into the brine. Use a food-grade brining bag, a clean 5-gallon bucket, a stockpot, or a cooler instead.
Does brining make the turkey too salty?
Not if you rinse it thoroughly after brining and do not add additional salt before roasting. The salt from the brine seasons the meat internally. If the turkey tastes too salty, you either brined too long, used too much salt, or forgot to rinse.
Can I dry brine instead of wet brine?
Yes. Dry brining (rubbing salt directly on the turkey and refrigerating uncovered for 24–48 hours) is an alternative method. It produces crispier skin but less moisture absorption. See the “Wet Brine vs Dry Brine” section earlier in this article.
How do I prevent the skin from getting rubbery after brining?
The key is the air-dry phase. After brining and rinsing, refrigerate the turkey uncovered on a wire rack for 8–12 hours. This dries out the skin, which allows it to crisp and brown during roasting. Do not skip this step.
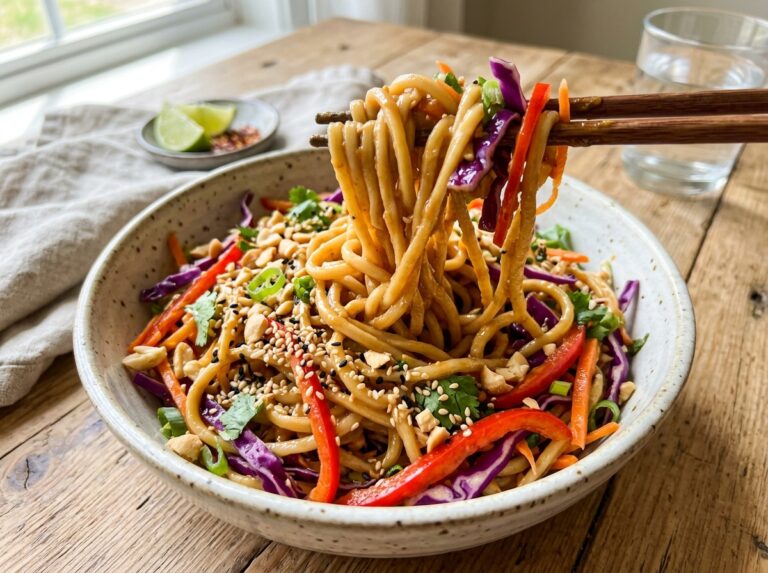
You Might Also Love These Recipes 🍽️
If you enjoyed mastering how to brine a turkey using the osmosis method, here are a few more techniques and recipes from The Flavour Bazar that will complete your Thanksgiving feast:
Air Fryer Whole Chicken (The Perfect Sunday Roast)
Practice your roasting technique on a smaller bird before Thanksgiving. This recipe uses the same science principles as turkey roasting.
Air Fryer Smashed Potatoes (Crispy Edges, Fluffy Centres)
The perfect side dish to pair with your brined turkey. Maximum crunch, minimum effort.
Homemade Chicken Gravy (From Drippings to Velvet)
Use your turkey drippings to make the smoothest, most flavourful gravy. The roux method explained.
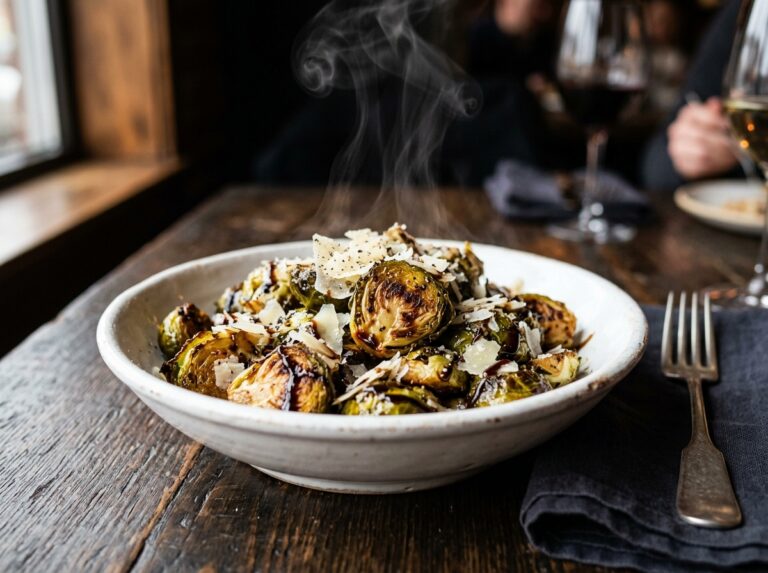
Crispy Air Fryer Brussels Sprouts with Garlic
Caramelization and Maillard browning applied to vegetables.
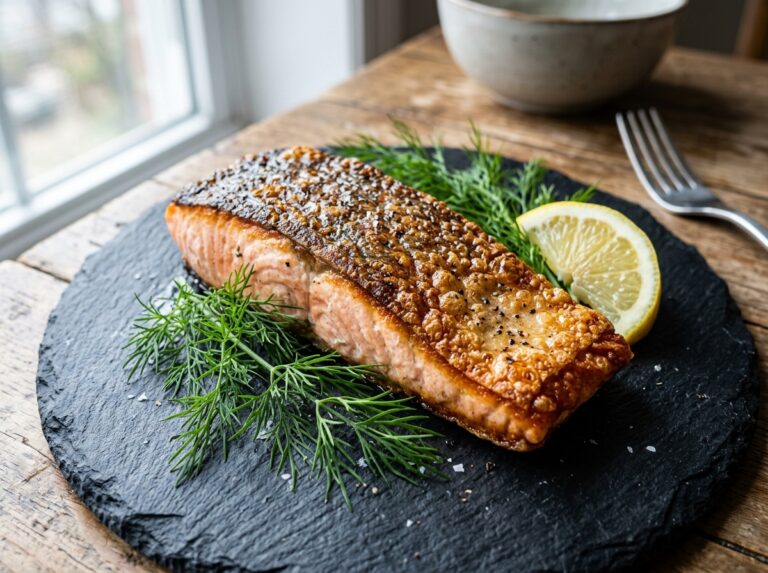
Air Fryer Salmon: The Science of the Perfect 15-Minute Recipe
The perfect salmon.
For Mover Healthy Recipes Visit: flavourbazar.com