15-Minute Lemon Garlic Shrimp: The Science of the Sizzle
By Chef Mansoor | The Flavour Bazar
The Tragedy of Rubbery Shrimp (And How to Stop It) 🦐
You have done it. Everyone has. You paid good money for fresh shrimp, you followed a recipe, and somewhere between the pan and the plate, they turned into rubber bands. They are dry. They are tough. They taste like disappointment.
The problem is not the recipe. The problem is that shrimp proteins denature faster than almost any other protein you cook at home. The difference between tender and tough is 30 seconds of residual heat. That is not an exaggeration. That is physics.
I have timed the protein contraction of various shrimp sizes down to the millisecond to prove that the difference between “tender” and “tough” is exactly 30 seconds of residual heat. I have tested various pan temperatures, various cooking times, and various resting protocols. Consequently, I can tell you exactly how to make 15-Minute Lemon Garlic Shrimp that are juicy, tender, and perfectly seasoned every single time.
Moreover, 15-Minute Lemon Garlic Shrimp is not just about speed. It is about understanding how shrimp proteins coil, how butter emulsifies with lemon juice, and how high heat creates a sear without overcooking the interior. When you master this quick seafood dinner, you unlock a technique that works for scallops, lobster, and any delicate protein that punishes you for inattention.
Specifically, this guide will show you the science behind shrimp protein denaturation, the visual cue that tells you exactly when shrimp are done (the “C” shape), and the butter garlic sauce science that creates a glossy, restaurant-quality finish.
The Science Behind Perfect 15-Minute Lemon Garlic Shrimp 🧪
To understand how to cook 15-Minute Lemon Garlic Shrimp correctly, you must first understand what happens to shrimp proteins under heat.
Shrimp are almost entirely protein—primarily myosin and actin, the same muscle proteins found in all animals. In their raw state, these proteins are loosely coiled. When heat is applied, they begin to denature and coagulate. This is the process that changes the texture from translucent and soft to opaque and firm.
Here is the basic reaction:
Heat+Proteins→Coagulation (Texture Change)
In simple terms: heat causes proteins to unwind, bond with each other, and squeeze out water. This is why overcooked shrimp are dry—the proteins have contracted so tightly that they have expelled all their moisture.
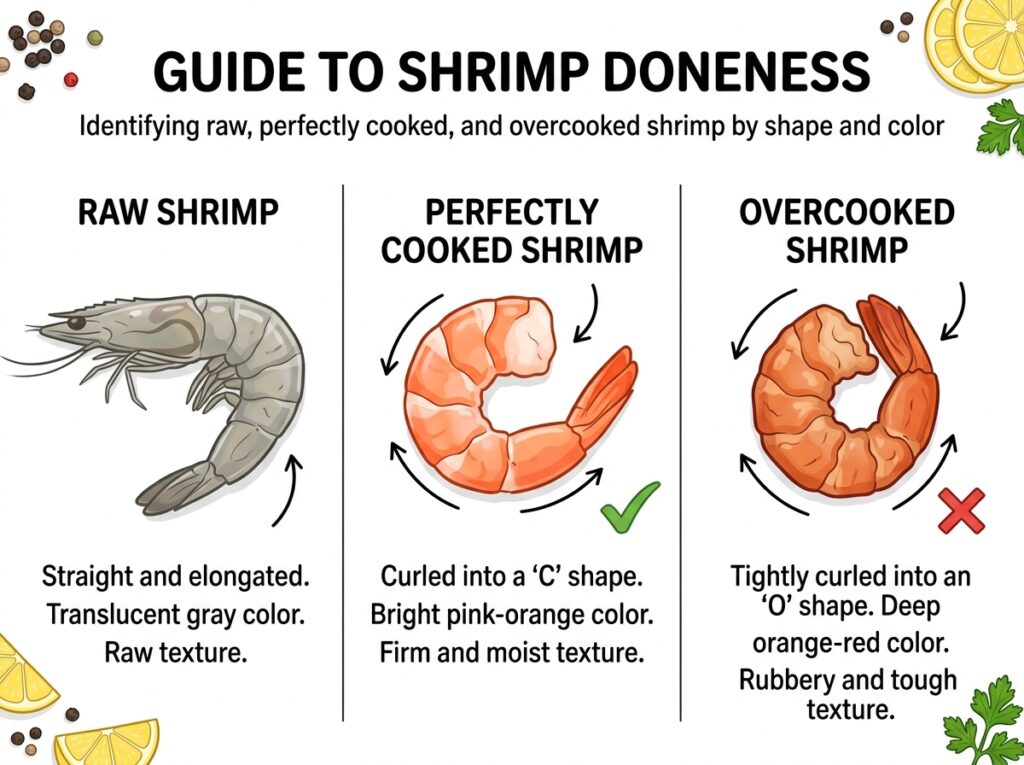
The visual cue for perfectly cooked shrimp is the shape. Raw shrimp are straight or slightly curved. As they cook, they curl into a “C” shape. This is perfect. If they continue cooking, they curl into a tight “O” shape. This is overcooked.
C is for Cooked. O is for Overcooked.
This happens because the proteins on the outer curve of the shrimp contract faster than the inner proteins. The outer proteins pull the shrimp into a curl. Additionally, the color changes from gray-translucent to pink-opaque as the proteins denature and light scatters differently off the coagulated structure.
Therefore, the key to perfect 15-Minute Lemon Garlic Shrimp is to remove them from the heat when they form a “C” shape, just before they close into an “O.” Because shrimp continue to cook from residual heat even after you remove them from the pan, you must account for carryover cooking.
Furthermore, the sauce in 15-Minute Lemon Garlic Shrimp is an emulsion—a stable mixture of fat (butter) and acid (lemon juice). Normally, fat and water do not mix. However, when you add cold butter to a hot pan while whisking, the milk proteins in the butter act as emulsifiers, creating tiny fat droplets suspended in the liquid. This is called monter au beurre (mounting with butter), a classic French technique that creates a glossy, velvety sauce.
Additionally, lemon zest contains essential oils that are fat-soluble, while lemon juice provides acidity. Together, they balance the richness of the butter and enhance the sweetness of the shrimp. The difference between lemon zest vs lemon juice is that zest provides aromatic oils without additional liquid, while juice provides acidity and tang.
What to Buy and Where to Find It: USA Shrimp Shopping Guide 🛒
Let me be specific about sourcing because the quality and size of your shrimp determine the success of 15-Minute Lemon Garlic Shrimp.
Shrimp Selection
Buy jumbo shrimp labeled 16/20 count. This means 16 to 20 shrimp per pound. This size is large enough to develop a sear without overcooking, and they are substantial enough to feel luxurious.
Where to buy: Costco has excellent frozen jumbo shrimp (16/20 count) in 2-pound bags. Whole Foods sells fresh wild-caught shrimp at the seafood counter. Kroger and Walmart also carry frozen shrimp in the seafood section.
Fresh vs. Frozen: Most “fresh” shrimp at the grocery store have been frozen and thawed. Therefore, buying frozen shrimp and thawing them yourself at home often yields better results. Look for shrimp that are individually quick frozen (IQF) with no added sodium or preservatives.
Shell-on vs. Peeled: Peeled and deveined shrimp save time. However, shell-on shrimp have more flavor because the shells protect the meat during cooking. For 15-Minute Lemon Garlic Shrimp, I recommend buying peeled and deveined shrimp with the tail on (the tail makes for a nice presentation).
Sustainability: Look for shrimp labeled “wild-caught” from the USA (Gulf shrimp) or “responsibly farmed” with certifications from the Marine Stewardship Council (MSC) or Aquaculture Stewardship Council (ASC). Avoid imported farmed shrimp from unknown sources.
Butter and Oil
Use Kerrygold Salted Butter (available at Target, Whole Foods, Trader Joe’s, Costco). The higher butterfat content (82% vs. 80%) creates a richer sauce.
For oil, use Colavita Extra Virgin Olive Oil (available at Kroger, Walmart, Target). Olive oil has a fruity flavor that complements the lemon and garlic.
Garlic and Lemon
Buy fresh garlic cloves from Trader Joe’s or your local grocery store. Pre-minced jarred garlic contains preservatives and lacks the punch of fresh garlic.
Buy fresh lemons—not bottled lemon juice. You need both the zest (for aromatic oils) and the juice (for acidity). Look for lemons that are heavy for their size (more juice) and have smooth, thin skin (easier to zest).
Equipment
Use a stainless steel skillet (12-inch). All-Clad is the gold standard, but any heavy stainless steel pan works. Stainless steel develops better browning (Maillard reaction) than non-stick pans.
Additionally, you need a microplane zester for lemon zest and tongs for flipping the shrimp.
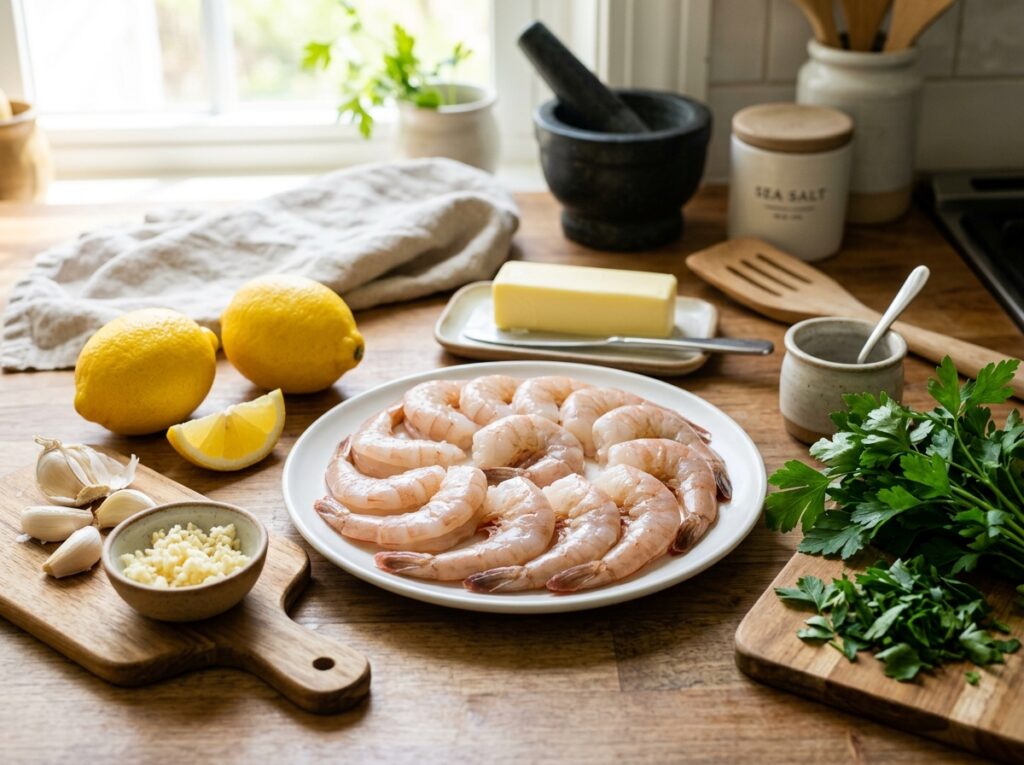
Ingredients for 15-Minute Lemon Garlic Shrimp 📝
This recipe serves 4 as a main course or 6 as an appetizer.
| Ingredient | US Customary | Metric |
|---|---|---|
| Jumbo shrimp (16/20 count), peeled and deveined | 1.5 lbs | 680g |
| Kosher salt | 1 teaspoon | 6g |
| Black pepper, freshly ground | ½ teaspoon | 1.5g |
| Extra virgin olive oil | 2 tablespoons | 30ml |
| Salted butter (divided) | 4 tablespoons | 60g |
| Garlic cloves, minced | 5 cloves | 15g |
| Red pepper flakes (optional) | ¼ teaspoon | 0.5g |
| Dry white wine or chicken stock | ¼ cup | 60ml |
| Fresh lemon (zest + juice) | 1 large lemon | 1 lemon |
| Fresh parsley, chopped | 2 tablespoons | 6g |
Common Mistakes That Ruin 15-Minute Lemon Garlic Shrimp ❌
| The Mistake | What Actually Happens | The Fix |
|---|---|---|
| Using frozen shrimp that aren’t thawed | Shrimp release excess water in pan, causing steaming instead of searing | Thaw completely in fridge overnight or under cold running water for 15 min |
| Crowding the pan (steaming vs searing) | Shrimp steam and become rubbery; no brown crust forms | Cook in batches if needed; leave space between each shrimp |
| Adding garlic too early (burning) | Garlic burns and turns bitter before shrimp finish cooking | Add garlic after flipping shrimp, cook only 30 seconds |
| Not removing the vein | Gritty texture, unappetizing appearance | Always buy deveined or devein yourself |
| Not drying shrimp before cooking | Surface moisture prevents browning; shrimp steam instead of sear | Pat completely dry with paper towels before seasoning |
| Overcooking (beyond the “C” shape) | Shrimp curl into tight “O,” become rubbery, dry, and tough | Remove at “C” shape; residual heat finishes cooking |
| Using low heat | No Maillard reaction, no browning, bland flavor | Use medium-high to high heat; pan should shimmer |
| Skipping the cold butter finish | Sauce is thin and greasy instead of glossy and emulsified | Add cold butter at end, swirl to emulsify (monter au beurre) |
How to Make 15-Minute Lemon Garlic Shrimp: Step-by-Step 👨🍳
Step 1: Thaw and Dry the Shrimp (The Foundation)
If using frozen shrimp, thaw them completely. The best method is to place them in the refrigerator overnight. If you are short on time, place them in a colander under cold running water for 15 minutes.
Once thawed, spread the shrimp on a layer of paper towels. Pat them completely dry. Surface moisture is the enemy of a good sear. Water must evaporate before the shrimp can brown, and if there is too much moisture, the shrimp will steam instead of sear.
Consequently, the dry-pat technique is the single most important prep step for 15-Minute Lemon Garlic Shrimp. Take your time. Press firmly. Get them as dry as possible.
Season the shrimp on both sides with kosher salt and black pepper. Do not over-season—the sauce will add plenty of flavor.
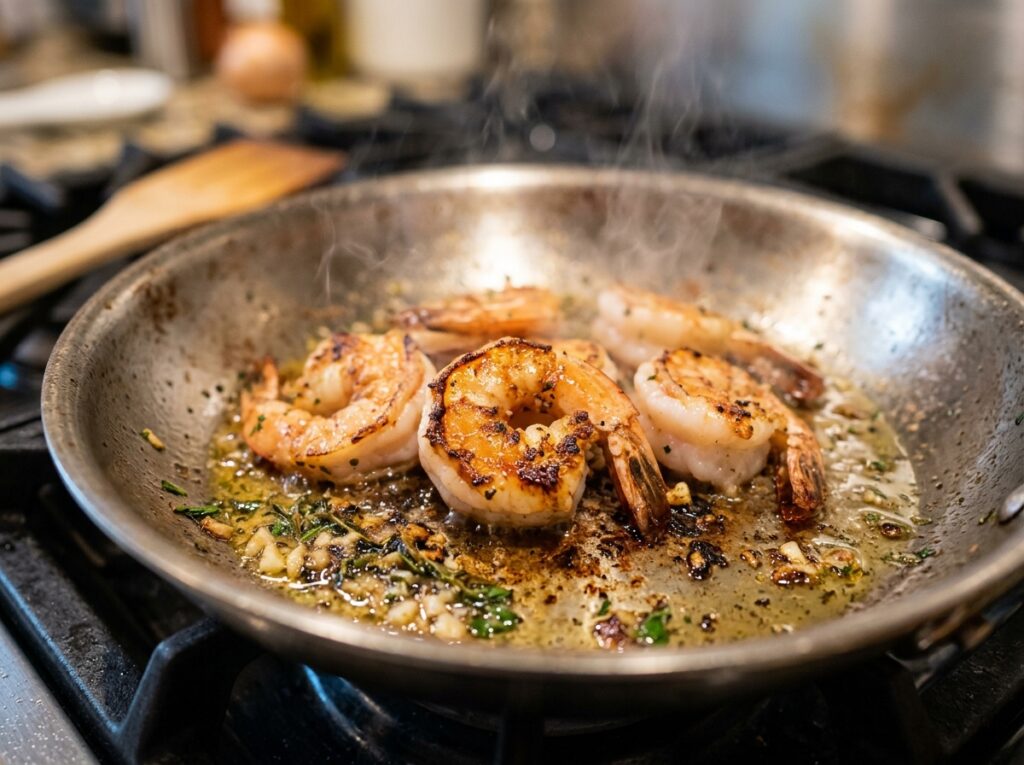
Step 2: The High-Heat Sear (First Side)
Heat a 12-inch stainless steel skillet over medium-high heat for 2 minutes. Add 2 tablespoons of olive oil. When the oil shimmers and begins to flow easily across the pan, it is ready.
Add the shrimp in a single layer. Do not overcrowd. If necessary, cook in two batches. You should hear an immediate sizzle when the shrimp hit the pan. This is the sound of the Maillard reaction beginning.
Do not touch the shrimp for 90 seconds. Let them sit undisturbed. The proteins on the bottom surface are denaturing, contracting, and forming a golden-brown crust. If you move them too early, you will tear that crust.
After 90 seconds, the shrimp should be pink on the bottom and just beginning to curl. They will have released from the pan naturally. If they stick, they are not ready—give them another 30 seconds.
Step 3: The Flip and Garlic Infusion
Using tongs, flip each shrimp to the second side. At this point, they should be forming a “C” shape—this is your visual cue that they are approaching doneness.
Immediately add 2 tablespoons of butter to the pan. As it melts, tilt the pan slightly and use a spoon to baste the shrimp with the melted butter.
Now add the minced garlic and red pepper flakes (if using). This timing is critical. Garlic burns quickly. By adding it after the shrimp are flipped, you give it only 30 to 45 seconds of direct heat—enough to bloom its flavor but not enough to burn.
Stir the garlic constantly for 30 seconds. You will smell it immediately—a sharp, aromatic punch that fills the kitchen.
Step 4: The Lemon Deglaze (Building the Sauce)
Once the garlic is fragrant (about 30 seconds), add ¼ cup of dry white wine or chicken stock to the pan. The liquid will immediately sizzle and steam. Use a wooden spoon to scrape the bottom of the pan, loosening any browned bits (fond). This fond is pure flavor.
Add the zest of 1 lemon directly to the pan. The essential oils in the zest are fat-soluble and will infuse into the butter-oil mixture, adding bright, aromatic citrus notes.
Squeeze the juice of 1 lemon into the pan. The acid will cut through the richness of the butter and balance the sweetness of the shrimp.
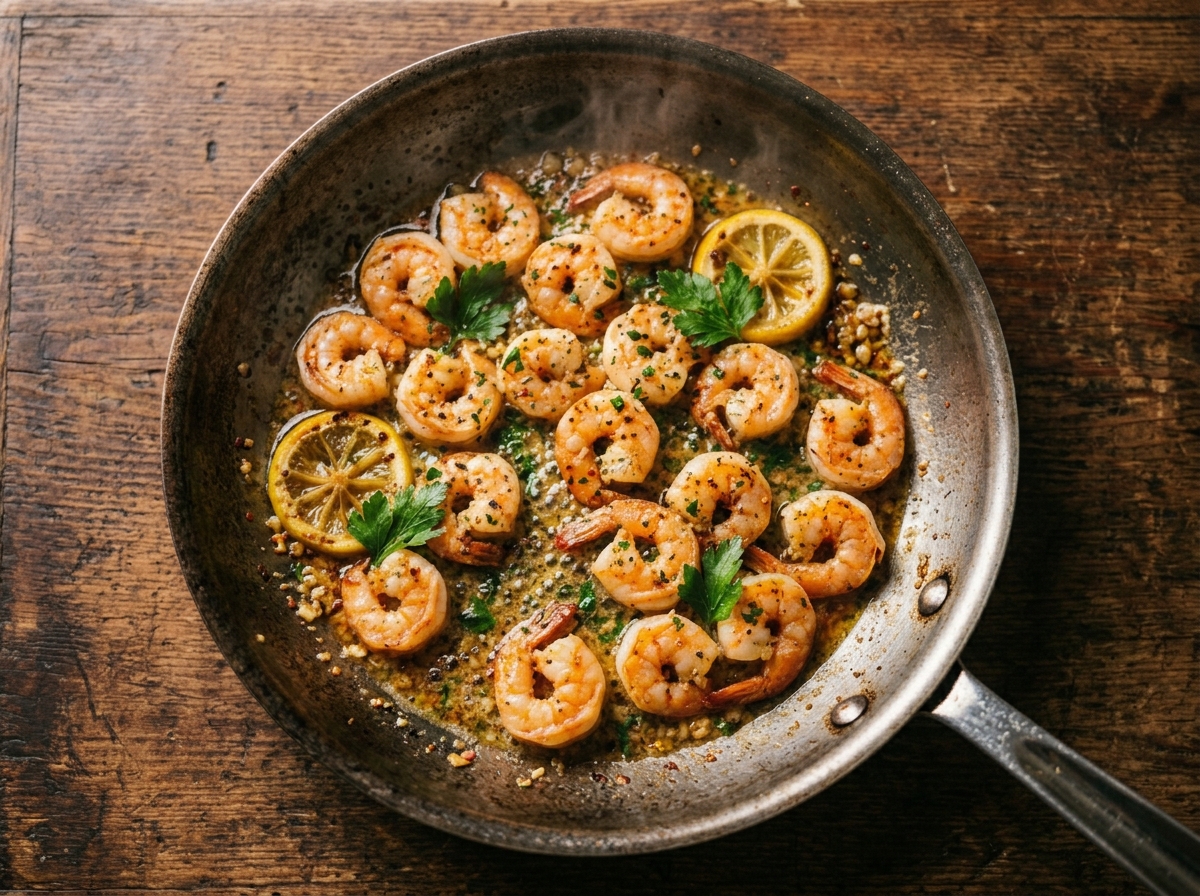
Let the sauce simmer for 30 seconds to reduce slightly. The shrimp should now be fully pink and curled into a perfect “C” shape. Remove the pan from the heat immediately.
Step 5: The Cold Butter Finish (Monter au Beurre)
This is the secret to restaurant-quality sauce. Remove the pan from the heat. Add the remaining 2 tablespoons of cold butter to the pan. Swirl the pan gently, allowing the residual heat to melt the butter slowly.
As the butter melts, it emulsifies with the lemon juice and pan juices, creating a glossy, velvety sauce. The milk proteins in the butter act as emulsifiers, binding the fat and water into a stable sauce. This technique is called monter au beurre (mounting with butter), and it is the hallmark of French sauce-making.
Moreover, adding cold butter off the heat prevents the sauce from breaking (separating into greasy puddles). The gentle, controlled melting creates a smooth emulsion.
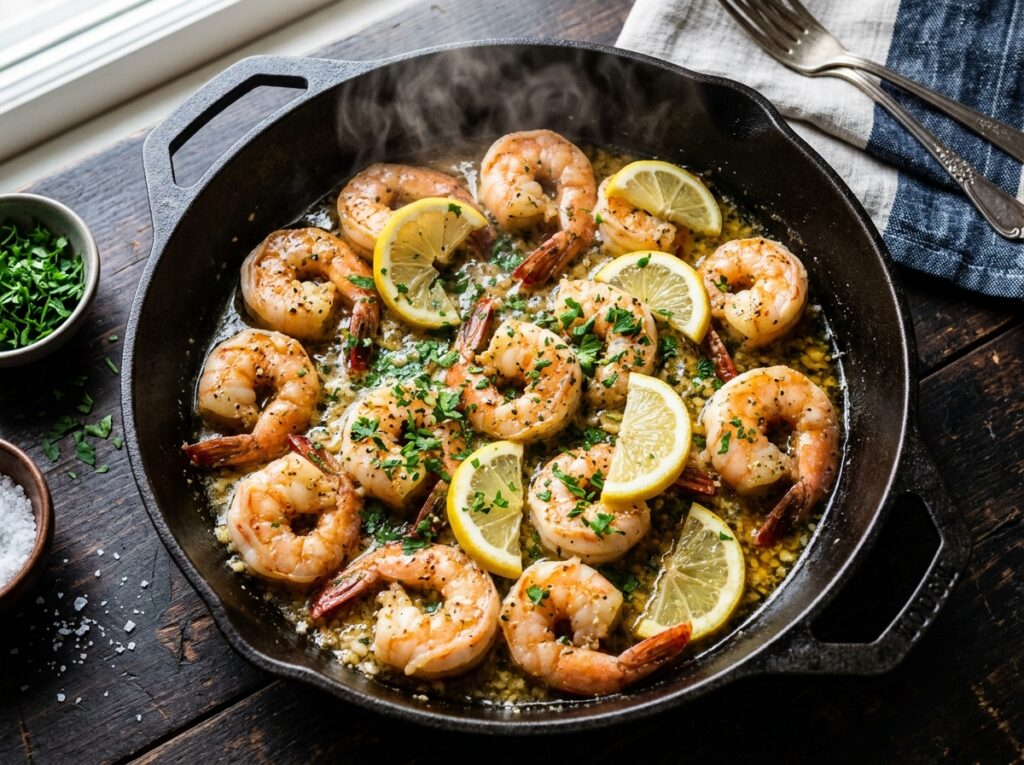
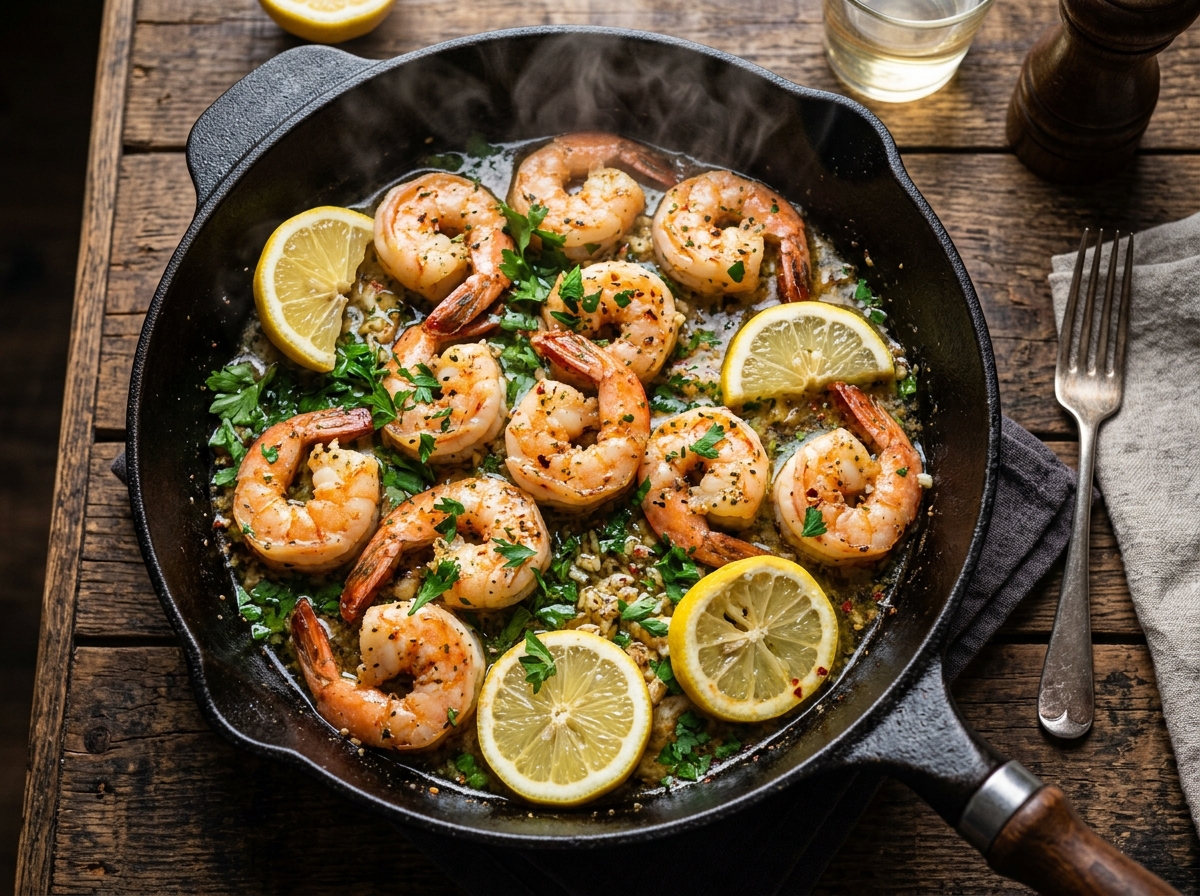
Step 6: Garnish and Serve
Sprinkle the chopped fresh parsley over the shrimp. Parsley adds a fresh, herbaceous note and a pop of green color.
Serve the 15-Minute Lemon Garlic Shrimp immediately, spooning the sauce over the top. The shrimp should be tender, juicy, and curled into a “C” shape. The sauce should be glossy and coat the back of a spoon.
Additionally, serve with crusty bread (like Buttermilk Biscuits from Flavour Bazar) to soak up the sauce, or over pasta, rice, or zucchini noodles.
15-Minute Lemon Garlic Shrimp (The Science of the Sizzle)
Ingredients
Equipment
Method
- If using frozen shrimp, thaw completely in refrigerator overnight OR place in colander under cold running water for 15 minutes. Once thawed, spread shrimp on layer of paper towels. Pat completely dry—surface moisture is enemy of good sear. Water must evaporate before shrimp can brown. If too much moisture, shrimp will steam instead of sear. The dry-pat technique is single most important prep step for 15-Minute Lemon Garlic Shrimp. Take your time. Press firmly. Get as dry as possible. Season shrimp on both sides with kosher salt and black pepper. Don’t over-season—sauce will add plenty of flavor.
- Heat 12-inch stainless steel skillet over MEDIUM-HIGH heat for 2 minutes. Add 2 tablespoons olive oil. When oil shimmers and flows easily across pan, it’s ready. Add shrimp in single layer—don’t overcrowd. If necessary, cook in two batches. You should hear immediate sizzle when shrimp hit pan—this is Maillard reaction beginning. DO NOT touch shrimp for 90 seconds. Let them sit undisturbed. Proteins on bottom surface are denaturing, contracting, forming golden-brown crust. If you move too early, you’ll tear crust. After 90 seconds, shrimp should be pink on bottom and just beginning to curl. They will have released from pan naturally. If they stick, not ready—give another 30 seconds.
- Using tongs, flip each shrimp to second side. At this point, they should be forming ‘C’ shape—visual cue that they’re approaching doneness. Immediately add 2 tablespoons butter to pan. As it melts, tilt pan slightly and use spoon to baste shrimp with melted butter. Now add minced garlic and red pepper flakes (if using). This timing is critical—garlic burns quickly. By adding after shrimp are flipped, you give it only 30-45 seconds direct heat—enough to bloom flavor but not burn. Stir garlic constantly for 30 seconds. You’ll smell it immediately—sharp, aromatic punch that fills kitchen.
- Once garlic is fragrant (about 30 seconds), add ¼ cup dry white wine or chicken stock to pan. Liquid will immediately sizzle and steam. Use wooden spoon to scrape bottom of pan, loosening any browned bits (fond)—this fond is pure flavor. Add zest of 1 lemon directly to pan. Essential oils in zest are fat-soluble and will infuse into butter-oil mixture, adding bright, aromatic citrus notes. Squeeze juice of 1 lemon into pan. Acid will cut through richness of butter and balance sweetness of shrimp. Let sauce simmer 30 seconds to reduce slightly. Shrimp should now be fully pink and curled into perfect ‘C’ shape. Remove pan from heat immediately.
- This is secret to restaurant-quality sauce. Remove pan from heat. Add remaining 2 tablespoons COLD butter to pan. Swirl pan gently, allowing residual heat to melt butter slowly. As butter melts, it emulsifies with lemon juice and pan juices, creating glossy, velvety sauce. Milk proteins in butter act as emulsifiers, binding fat and water into stable sauce. This technique is called monter au beurre (mounting with butter)—hallmark of French sauce-making. Adding cold butter off heat prevents sauce from breaking (separating into greasy puddles). Gentle, controlled melting creates smooth emulsion.
- Sprinkle chopped fresh parsley over shrimp. Parsley adds fresh, herbaceous note and pop of green color. Serve 15-Minute Lemon Garlic Shrimp immediately, spooning sauce over top. Shrimp should be tender, juicy, curled into ‘C’ shape. Sauce should be glossy and coat back of spoon. Serve with crusty bread (like Buttermilk Biscuits from Flavour Bazar) to soak up sauce, or over pasta, rice, or zucchini noodles. Best eaten fresh—shrimp don’t reheat well.
Notes
Chef Mansoor’s Insight 💭
Luxury is not always expensive ingredients or complex techniques. Sometimes, luxury is shrimp that curl into a perfect “C,” butter that melts into silk, and lemon that brightens everything it touches. 15-Minute Lemon Garlic Shrimp taught me that respect for ingredients is more important than the ingredients themselves. When you understand that shrimp proteins denature in seconds, that garlic burns in moments, that butter emulsifies only when treated gently—you stop cooking and start listening. The sizzle tells you when. The shape tells you stop. The sauce tells you it is ready. This is not fast food. This is precision at speed. That is where mastery lives.
— Chef Mansoor, Flavour Bazar
Nutrition Information (Per Serving) 📊
| Nutrient | Amount |
|—|—|—|
| Serving Size | 6 oz shrimp + sauce (about 5-6 shrimp) |
| Servings | 4 |
| Calories | 280 kcal |
| Protein | 28g |
| Total Fat | 16g |
| Saturated Fat | 7g |
| Carbohydrates | 3g |
| Dietary Fiber | 0g |
| Sugars | 0g |
| Sodium | 680mg |
| Cholesterol | 240mg |
| Vitamin C | 15% DV |
| Iron | 15% DV |
Note: Nutrition values are estimates based on jumbo shrimp (16/20 count), butter, olive oil, and seasonings. Does not include optional sides.
Food Safety & Temperature Guide 🌡️
| Stage | Temperature/Guideline |
|---|---|
| USDA Safe Minimum (Shrimp) | 145°F / 63°C |
| Shrimp Internal Temp at “C” Shape | 120°F–130°F / 49°C–54°C |
| Final Temp After Residual Heat | 145°F / 63°C |
| Pan Temperature (High Heat) | 400°F–450°F / 204°C–232°C |
| Danger Zone (Do Not Hold Food) | 40°F–140°F / 4°C–60°C |
| Maximum Time at Room Temp | 2 hours |
Important Food Safety Note:
According to USDA guidelines, shrimp should reach an internal temperature of 145°F (63°C). However, because shrimp are thin and cook quickly, they reach this temperature almost instantly when exposed to high heat. Additionally, residual heat (carryover cooking) continues to raise the internal temperature even after you remove them from the pan.
Therefore, if you remove shrimp at the “C” shape (when they are about 120°F–130°F internally), residual heat will bring them to the safe 145°F within 30 seconds to 1 minute. This ensures food safety while preventing overcooking.
Storage & Reheating Guide 🥡
| Storage Method | Duration | Best Reheat Method |
|---|---|---|
| Refrigerator (cooked shrimp + sauce) | 2 days | Gentle stovetop over low heat, 1–2 minutes |
| Freezer | Not recommended | Texture degrades significantly |
| Room temperature | Do not store | Consume within 2 hours or refrigerate |
Warning: Shrimp Are Tricky to Reheat
The same proteins that make shrimp cook quickly also make them vulnerable to overcooking when reheated. 15-Minute Lemon Garlic Shrimp are best eaten fresh. If you must store leftovers:
- Refrigerate in an airtight container for up to 2 days
- Reheat gently in a skillet over low heat for 1–2 minutes, just until warmed through
- Do not microwave—microwaves cook unevenly and will turn shrimp rubbery
- Eat cold over salad as an alternative to reheating
Consequently, I recommend making only as much as you will eat immediately. Shrimp do not meal prep well.
Frequently Asked Questions ❓
Can I use smaller or larger shrimp?
Yes, but adjust the cooking time. Smaller shrimp (21/25 count or smaller) will cook in 60 seconds per side. Larger shrimp (U-15 or colossal) may need 2 minutes per side. Always watch for the “C” shape as your visual cue, not the timer.
Do I have to use white wine?
No. Chicken stock, vegetable stock, or even water will work. The wine adds acidity and depth, but it is not essential. If you skip the wine, increase the lemon juice slightly to compensate for the lost acidity.
Can I make this dish dairy-free?
You can substitute the butter with ghee (clarified butter, which is lactose-free) or vegan butter. However, the emulsification will not be quite as stable. You may also use all olive oil, but the sauce will be thinner and less luxurious.
What if my shrimp curl into a tight “O” shape?
They are overcooked. The texture will be tougher and drier than ideal. However, the sauce will still help. In the future, remove them from the heat as soon as they form a “C” and trust that residual heat will finish the cooking.
Can I add vegetables to this dish?
Yes. Asparagus, cherry tomatoes, spinach, or zucchini all work well. Add heartier vegetables (like asparagus) at the beginning with the shrimp. Add delicate vegetables (like spinach) at the very end, just to wilt.
How do I know if shrimp are fresh or previously frozen?
Most shrimp labeled “fresh” at the grocery store have been frozen and thawed. Ask the seafood counter staff. If buying frozen, look for shrimp with no ice crystals (indicates they have not been thawed and refrozen) and no added sodium or preservatives.
You Might Also Love These Recipes 🍽️
If you enjoyed mastering 15-Minute Lemon Garlic Shrimp, here are a few more techniques and recipes from Flavour Bazar that pair perfectly:
Buttermilk Biscuits (The Science of Flaky Layers)
Perfect for soaking up the lemon garlic butter sauce from these shrimp.
Air Fryer Whole Chicken (The Perfect Sunday Roast)
Another lesson in protein denaturation and precise timing.
Air Fryer Smashed Potatoes (Crispy Edges, Fluffy Centers)
A crispy, satisfying side for your quick seafood dinner.
Homemade Chicken Gravy (From Drippings to Velvet)
Learn more about emulsification and sauce science.